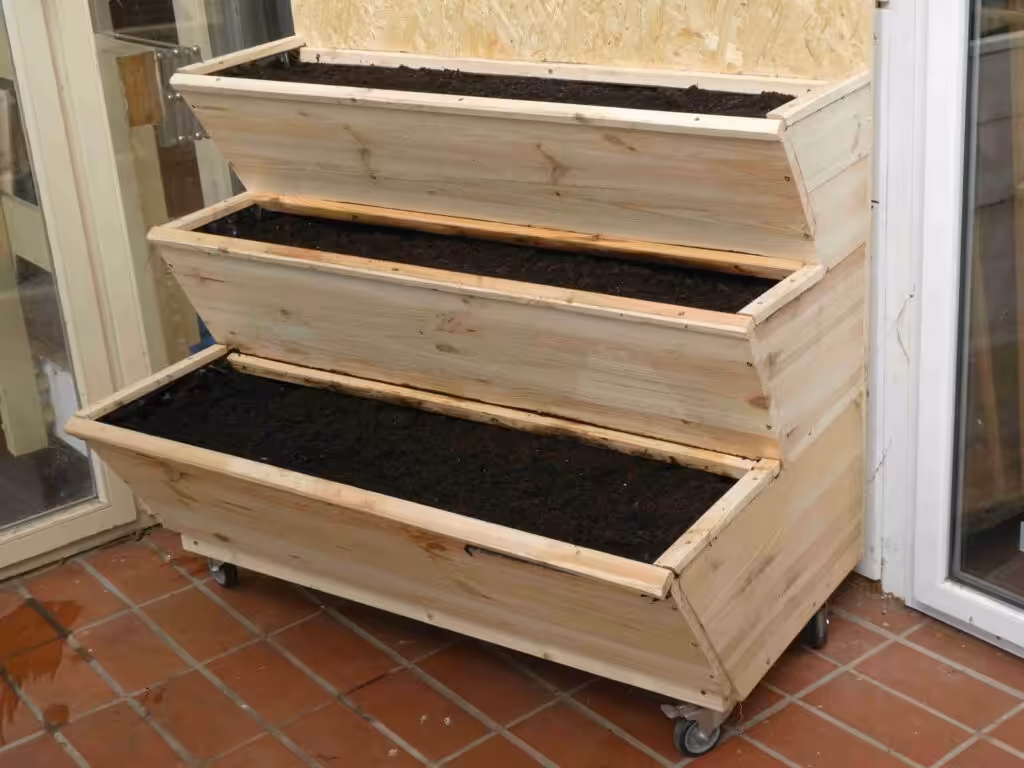
Variant 1 vertical gardening DIY
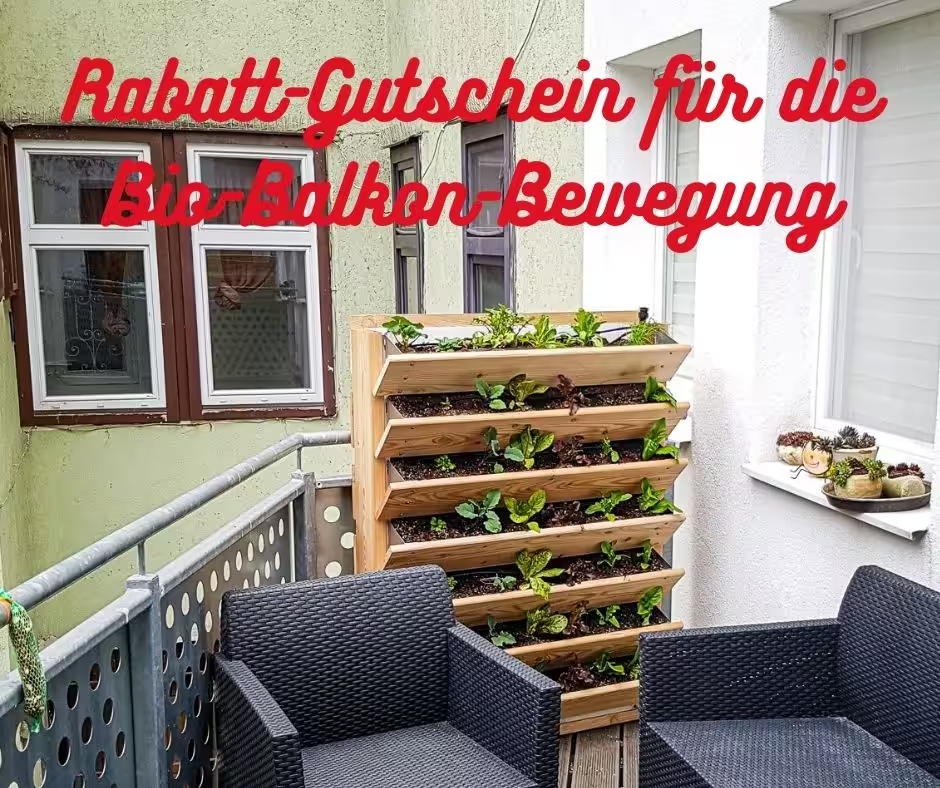
Inspired by the Organic Balcony Congress received the following email at the beginning of April 2020. It is intended to inspire people who like to tinker to build an inexpensive vertical bed. The investment costs are 60 EUR!
Dear Birgit! But first I would like to thank you very much for this great, varied and super-organized organic balcony congress. My sister recommended it to me. I have to say, there were so many different and wide-ranging topics, I really didn’t expect that. But in view of the time off and working from home, you need a distraction — and your congress and the suggestions and impulses came just at the right time!
A Propos Impulse: My friend and I have read the contribution from Jürgen Herler for vertical gardening with vertical beds. Until now, we were only familiar with raised beds, but not this balcony-suitable version. We have decided: We are recreating that. Now my friend works in a carpentry shop and therefore has some tools at hand that were necessary for building (at the moment the wood cutting is stopped in the DIY stores…) I have attached some photos that you are welcome to use on your website as inspiration for others for an inexpensive vertical bed.
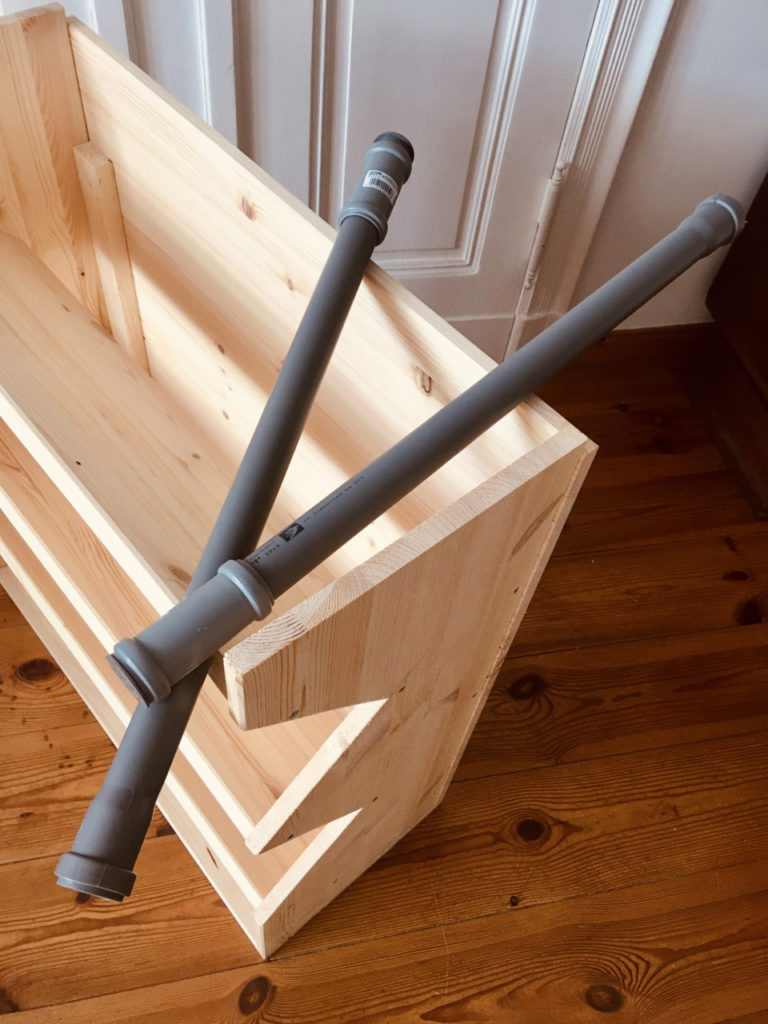
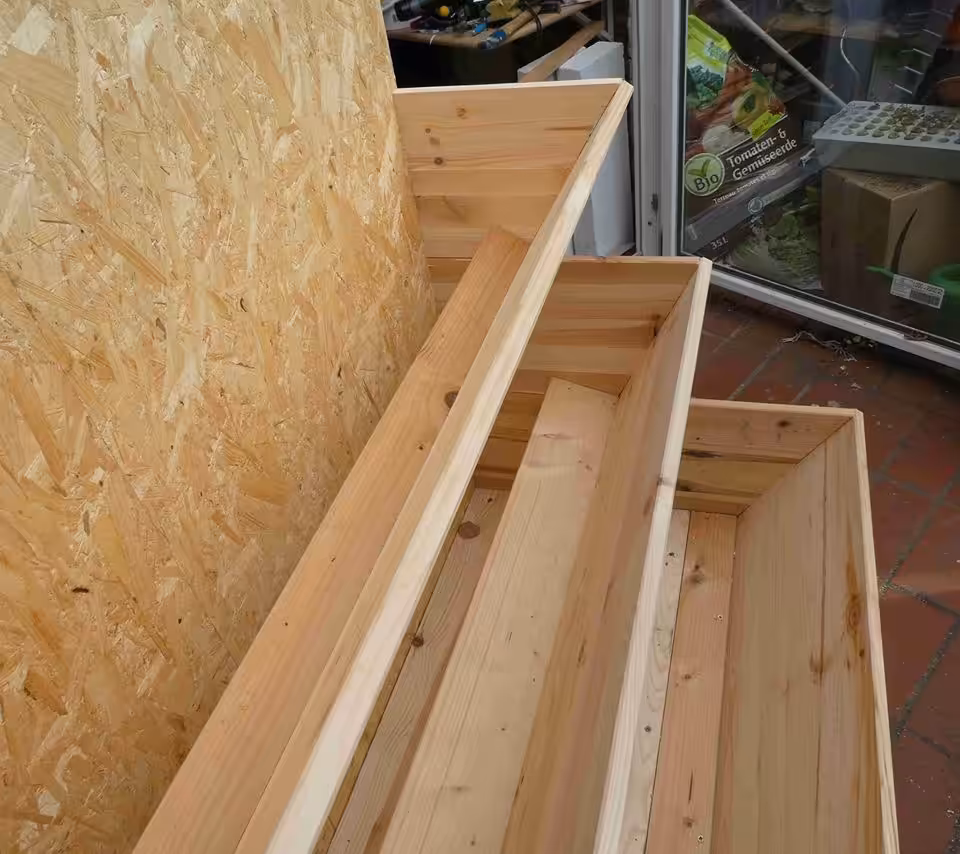
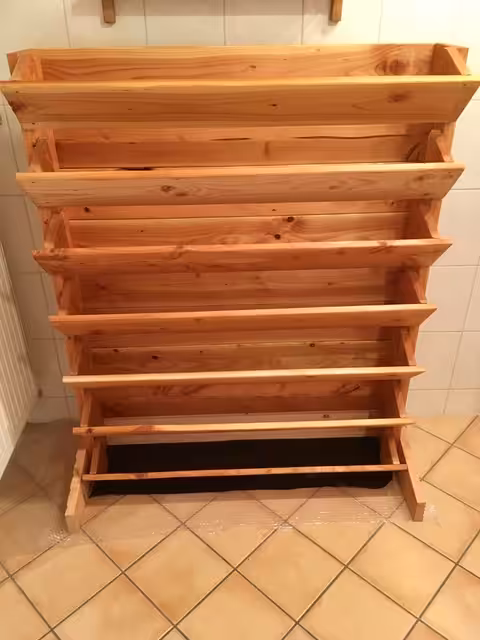
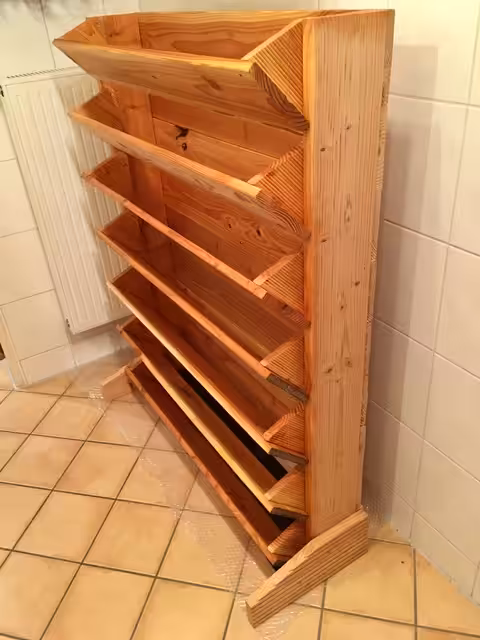
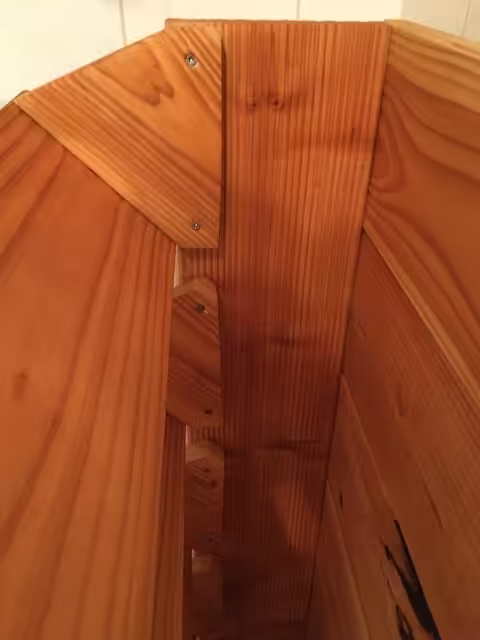
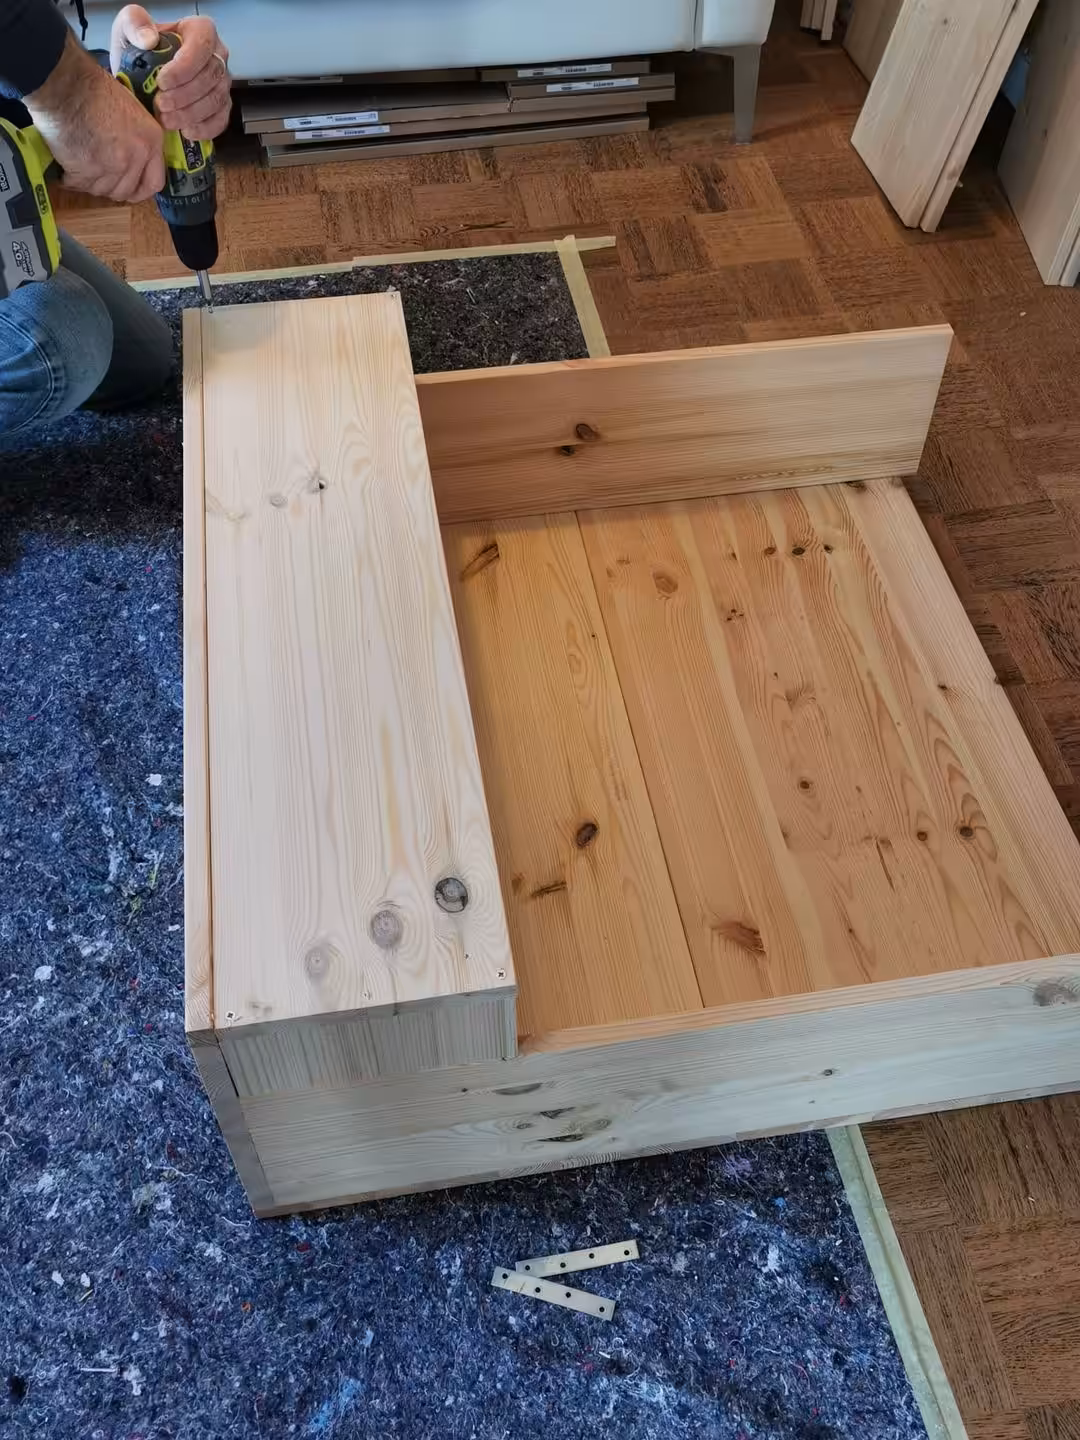
So far, the body is in place.


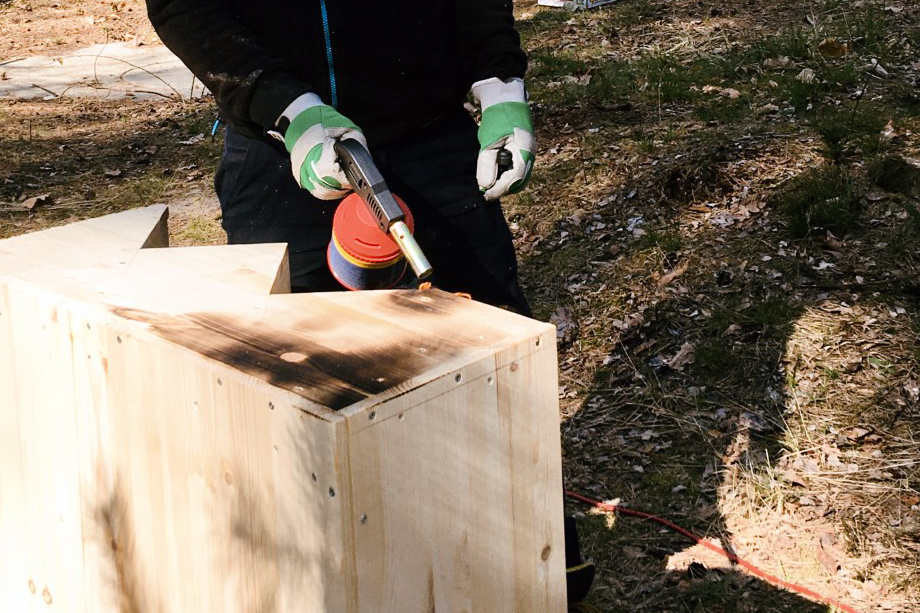
To protect it from the weather, my friend flamed it with a blowtorch (gas cartridge).


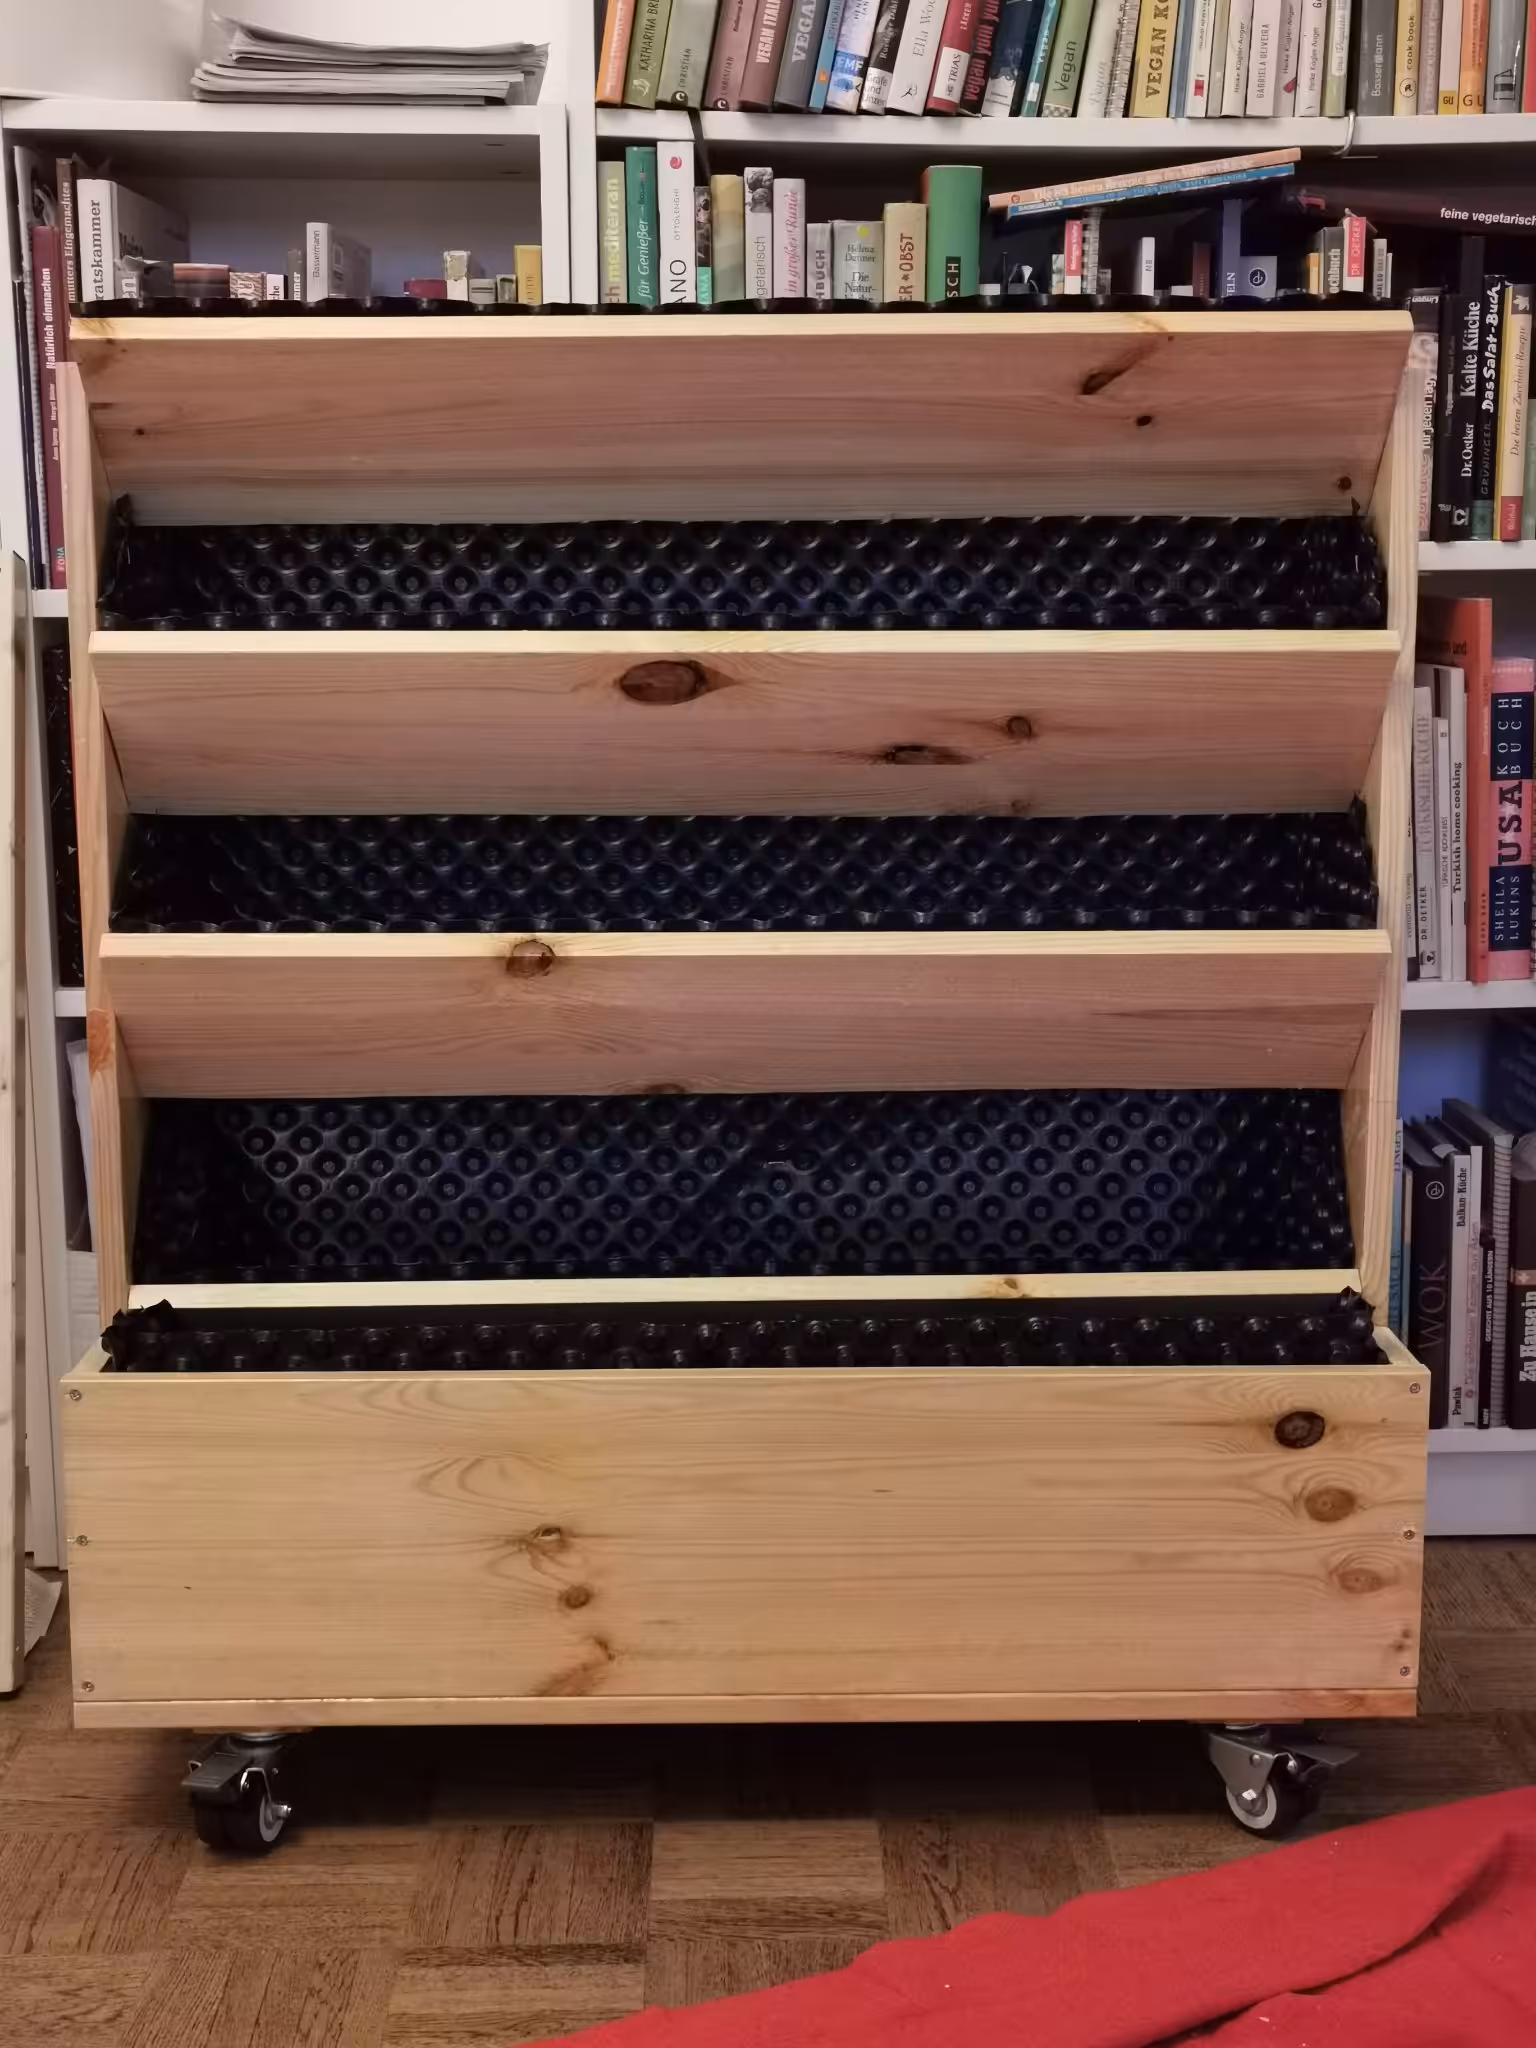
Here are a few more facts about the self-built vertical bed variant 1:
Dimensions: 75 cm wide 30 cm deep 80 cm high
Material:
- Boards (spruce, pine)
- Squared timber
- HT pipe (waste water pipe) 2/3 of the bed height
- Screws
Costs: approx. 60 euros plus plants and soil
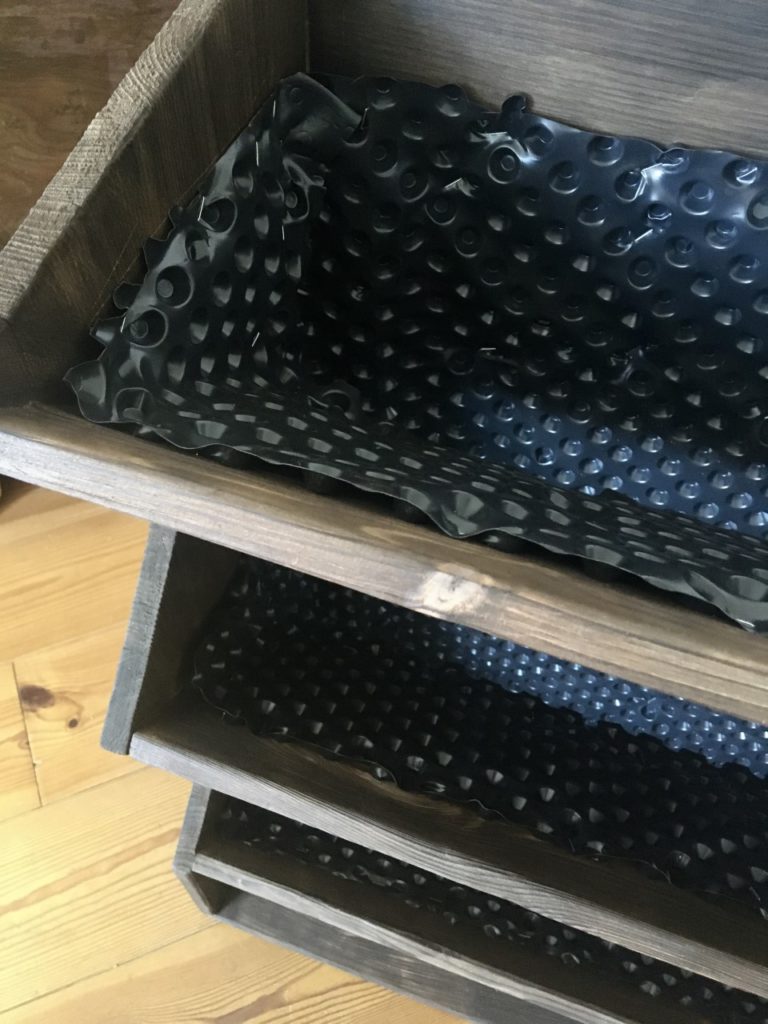
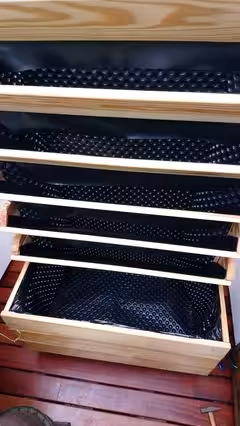
The next step is to cover it with a film, preferably without harmful substances. Do you have any ideas? What do you use? Best regards Corinna
I wrote: Doris Kampas, also represented at the congress, sells raised beds. She recommends larch because of its durability or oak, which is very expensive. Spruce not at all, pine possibly. She talked about lining raised beds with bubble wrap, which is used at the bottom of the base of houses. Made from plasticizer-free PE.

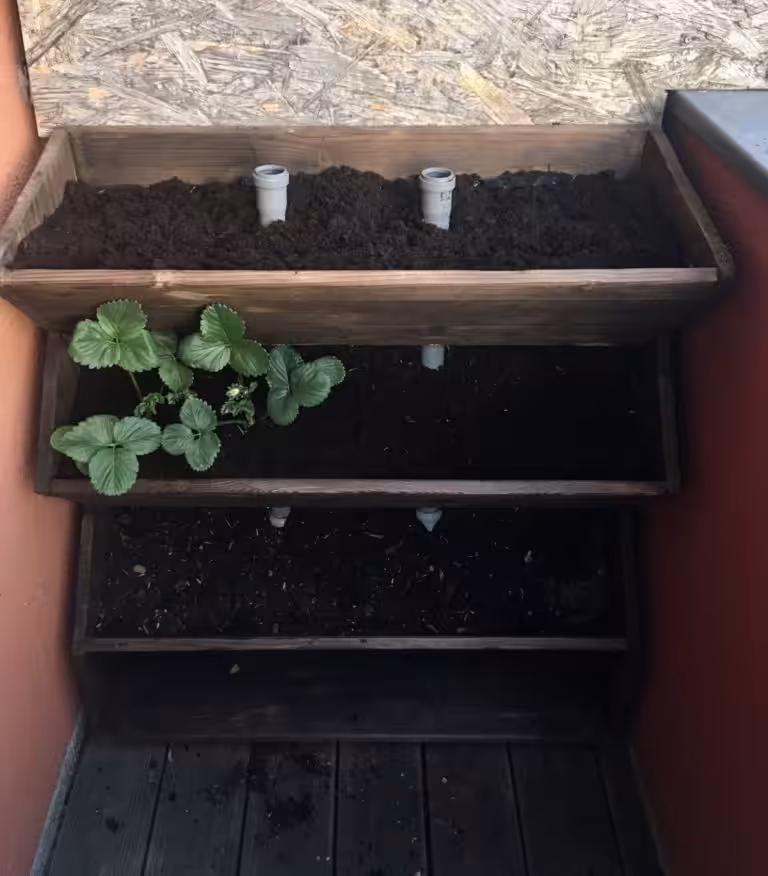
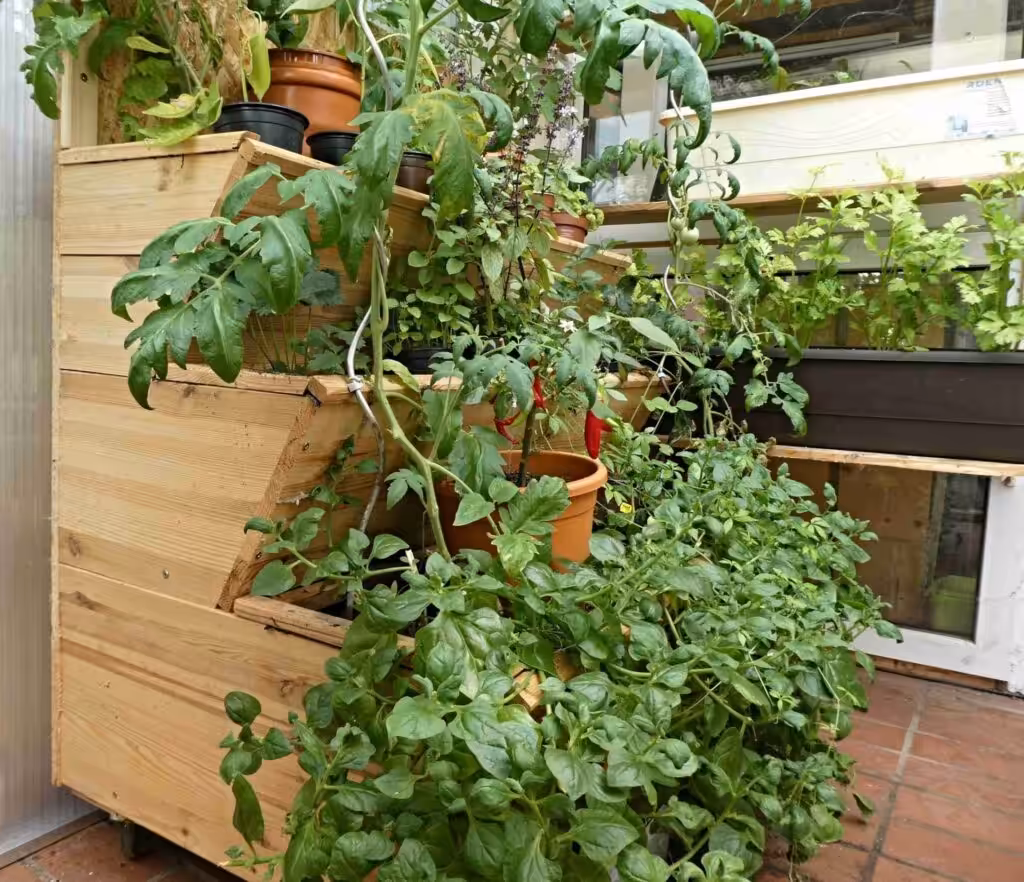
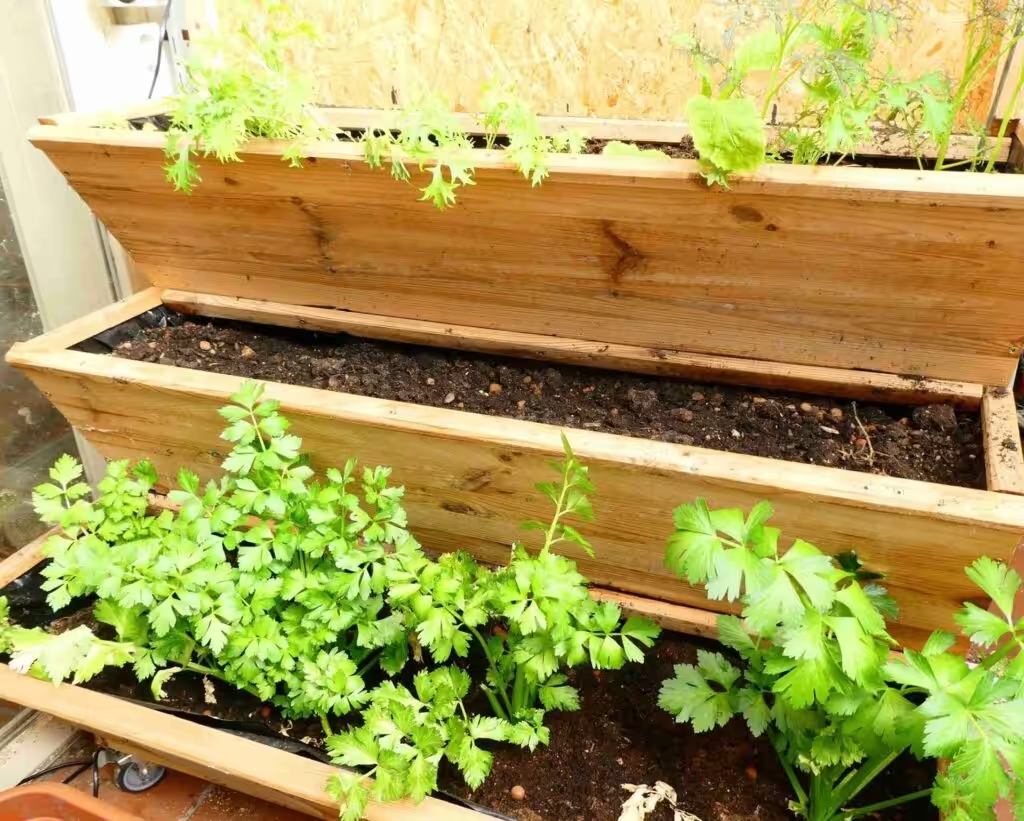
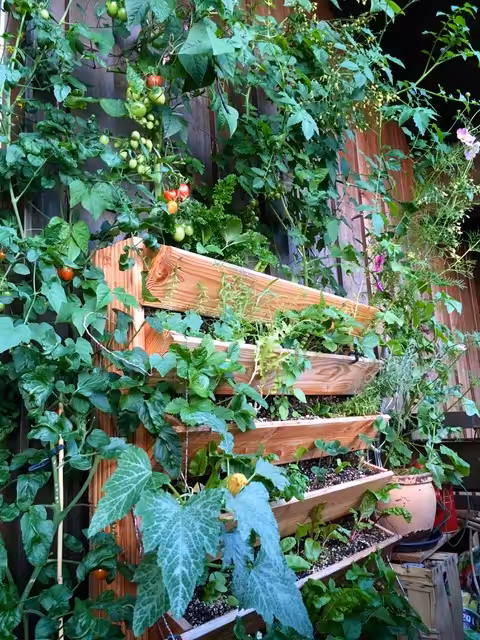
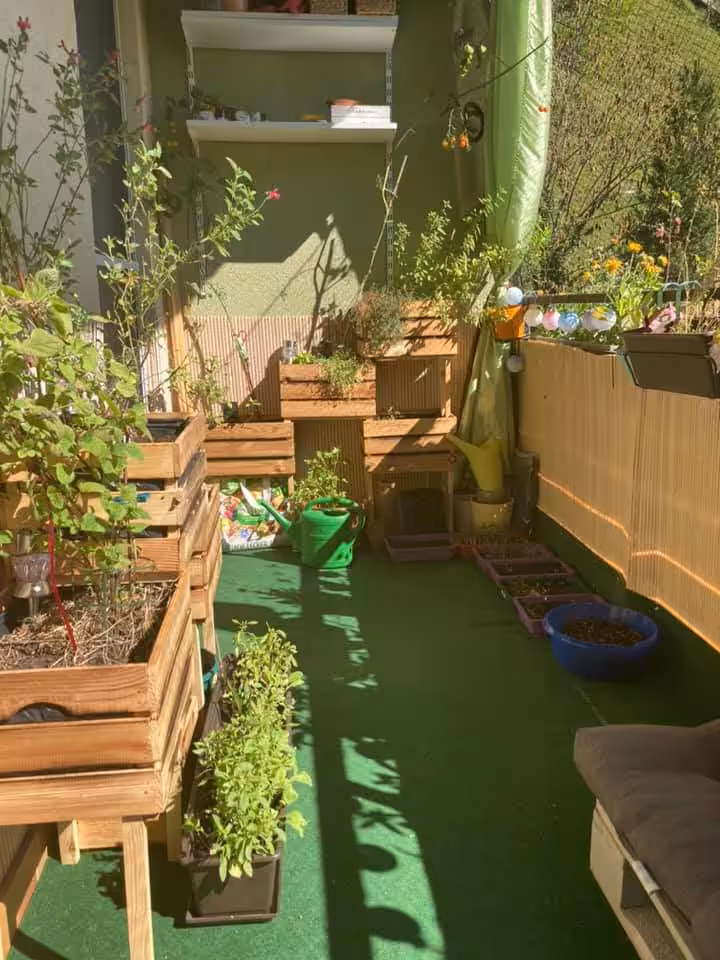
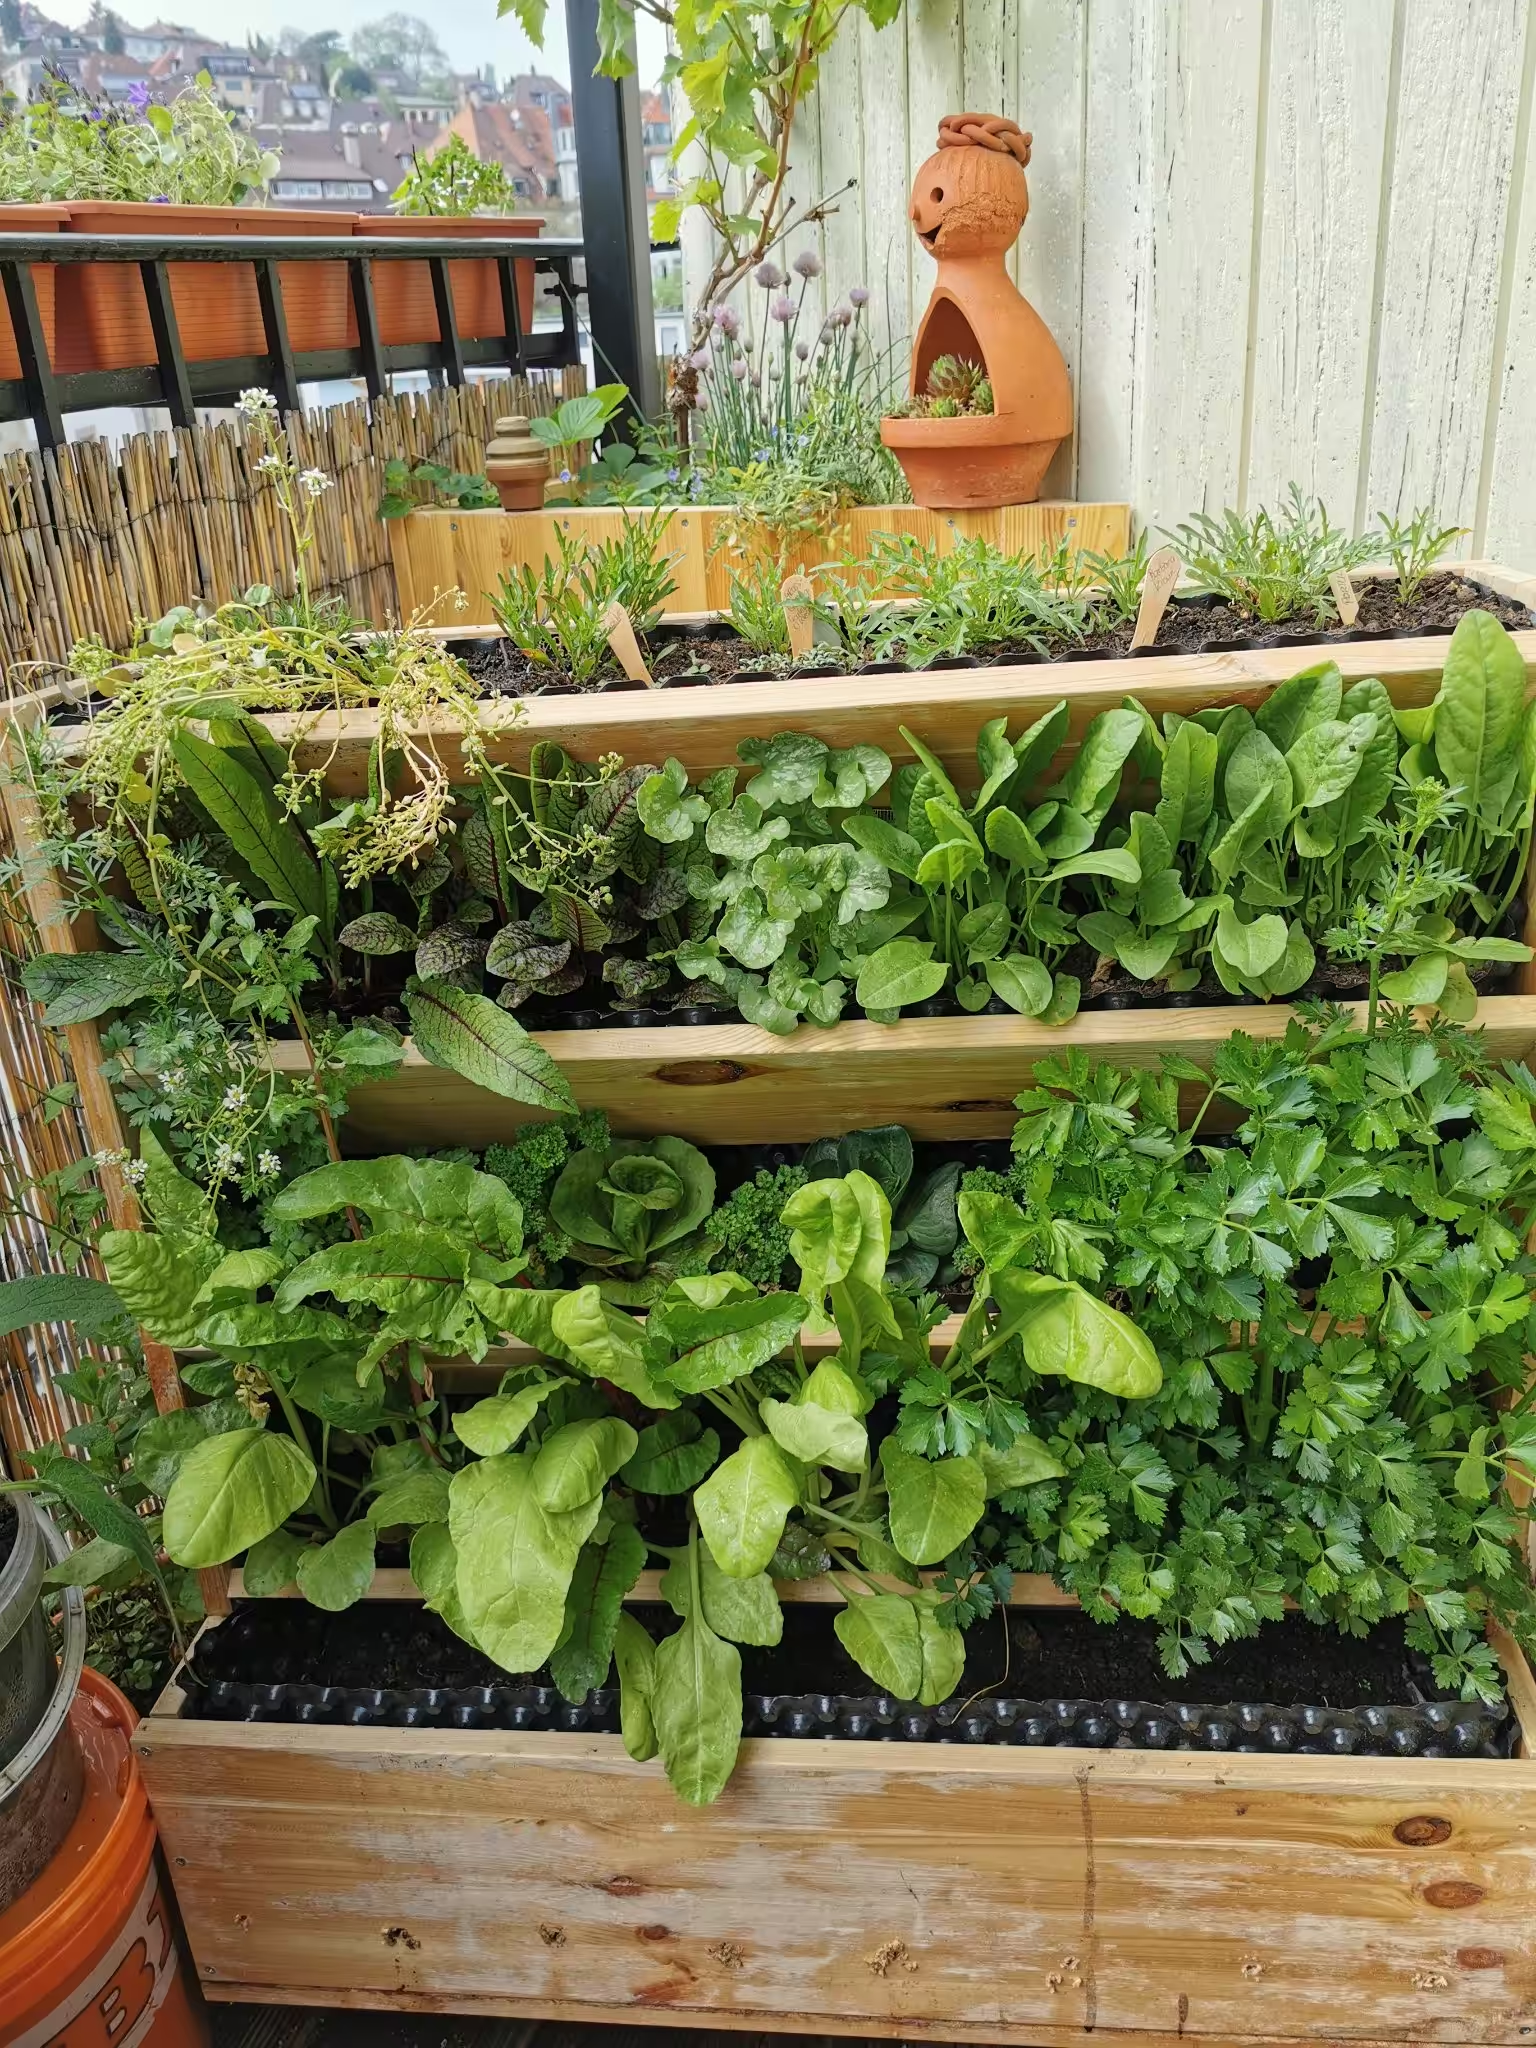
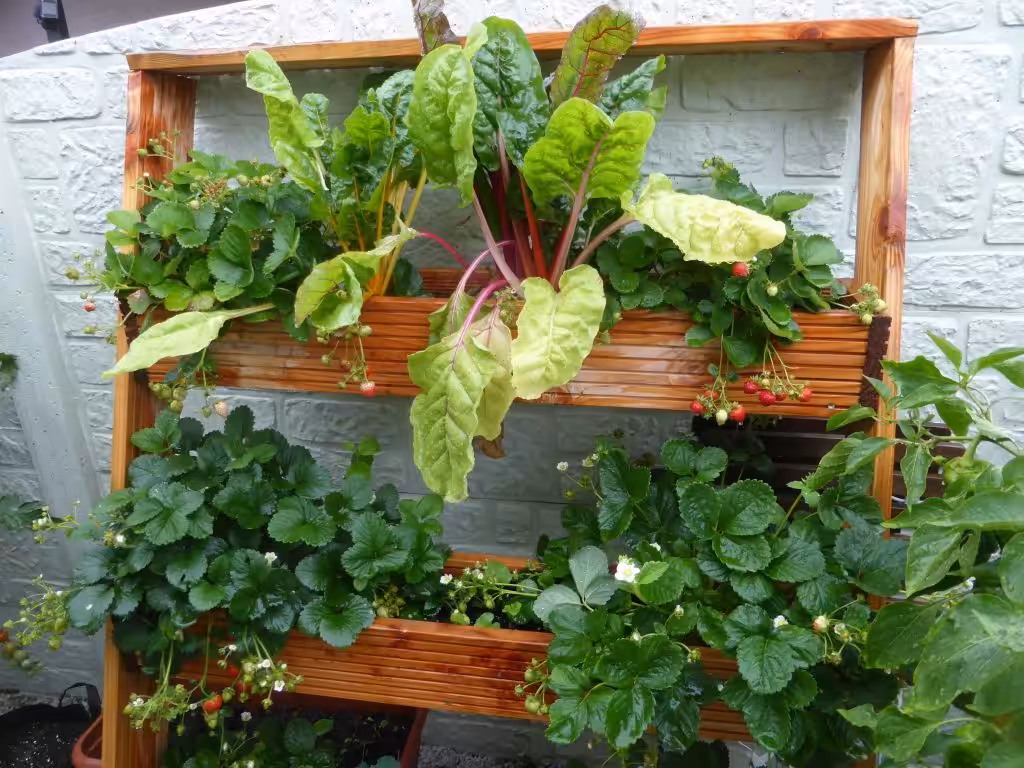
Here are some pictures of the planting. Really cool. I’m really happy about something like this because it’s so enriching. 60 EUR. Wow. That’s quite something.
Thank you Corinna and Andi W.that I may publish your photos.
Vertical gardening — variant 2 DIY
Another fine variation on vertical gardening from Silke B., a long-time participant in the online Organic Balcony Congresses. Her self-built vertical bed is already proving its worth there for the 3rd year.
Dear Birgit, I followed (almost) all the videos very closely again this year! Thank you for your tireless efforts in this important project, I admire your discipline, perseverance and passion, it gets more extensive and professional every year. Of course you can use the pictures as you see fit. I planted a lot in the vertical bed last year, had radishes, various lettuces and bee flowers on the top shelf. Unfortunately, I was abroad for the whole of July, August and September; my son lovingly took care of the watering and I didn’t get to see much of it. Also, a caterpillar that was passionate about eating the radishes/lettuce leaves then spread very widely, so the harvest was a complete failure.…☹️
My son didn’t pay much attention to this, otherwise the plague might have been contained. The huge harvest of tomatoes, cucumbers, chillies, zucchinis, pumpkins, raspberries, strawberries and even eggplants made up for this, providing my son with plenty of fresh vegetables. It’s a shame that I can’t send you an up-to-date photo of the vertical bed; I only recently sowed beet and radishes again, so unfortunately nothing is visible yet. (This time I’m here, so I can inspect the leaves every day?). Silke wishes you a blessed springtime with your diverse plantings on the balconies and lots of strength for your increasingly extensive tasks and contacts on the Internet and elsewhere.
Thank you Silke B.that I may publish your photo and your e‑mail.
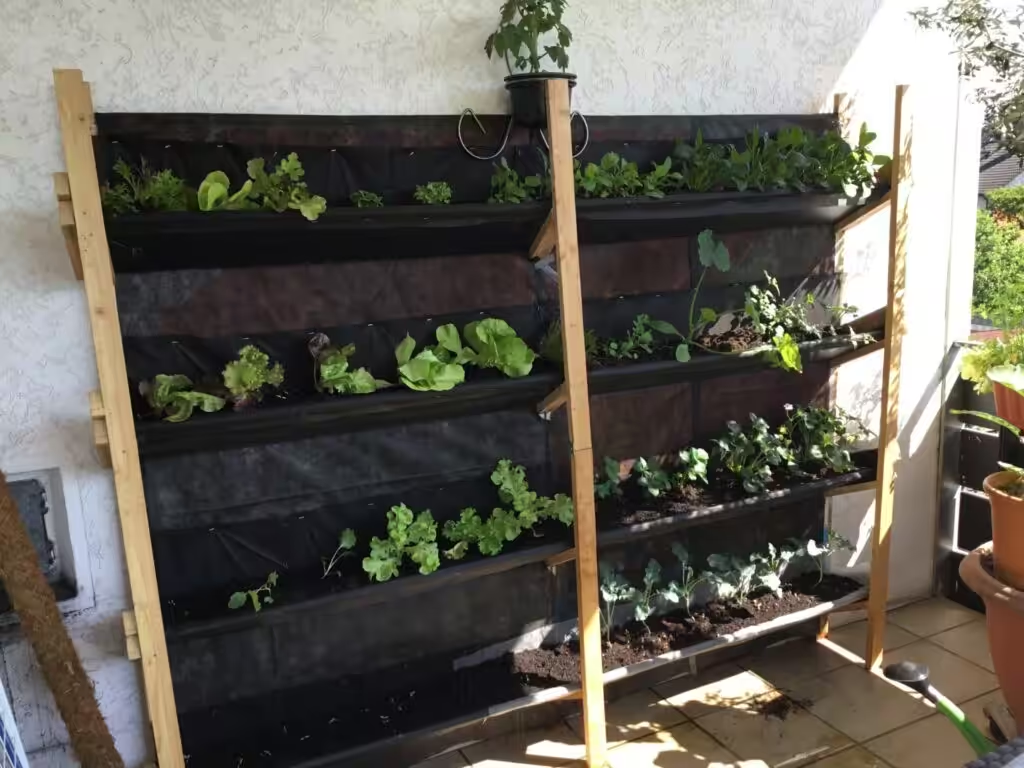
Vertical gardening — variant 3 DIY
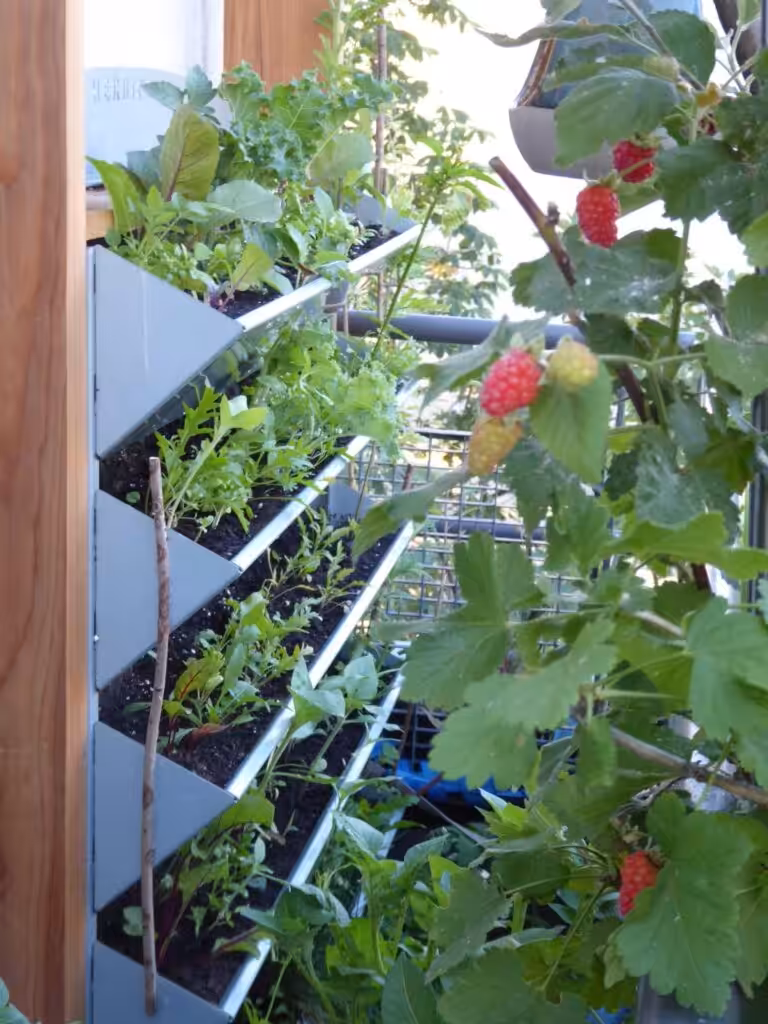
This is what this third variant looked like after completion in 2017. Dr. Jürgen Herler from Herbios.at spoke in an interview at the 1st Online Organic Balcony Congress and inspired Edwin S. to get creative.
The individual floors are open and connected at the back from top to bottom.
Edwin’s building instructions: I don’t have any instructions, apart from the information that the boards are made of 18 mm thick, 1.20 m long canvas from the DIY store. The back wall consists of a so-called OSB board, also 18 mm thick (but could also be made from glued laminated timber). I left the wood untreated, just lined it with black construction foil to make it last a little longer. A handsaw and cordless screwdriver were all I needed.
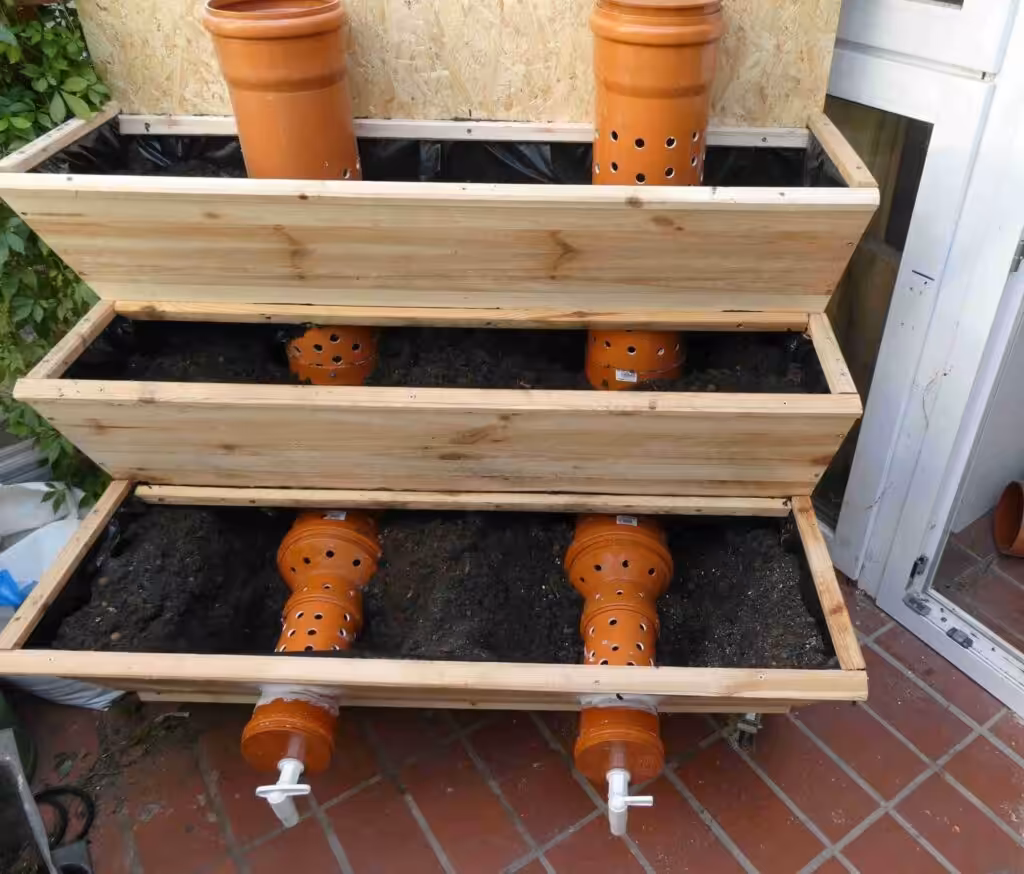
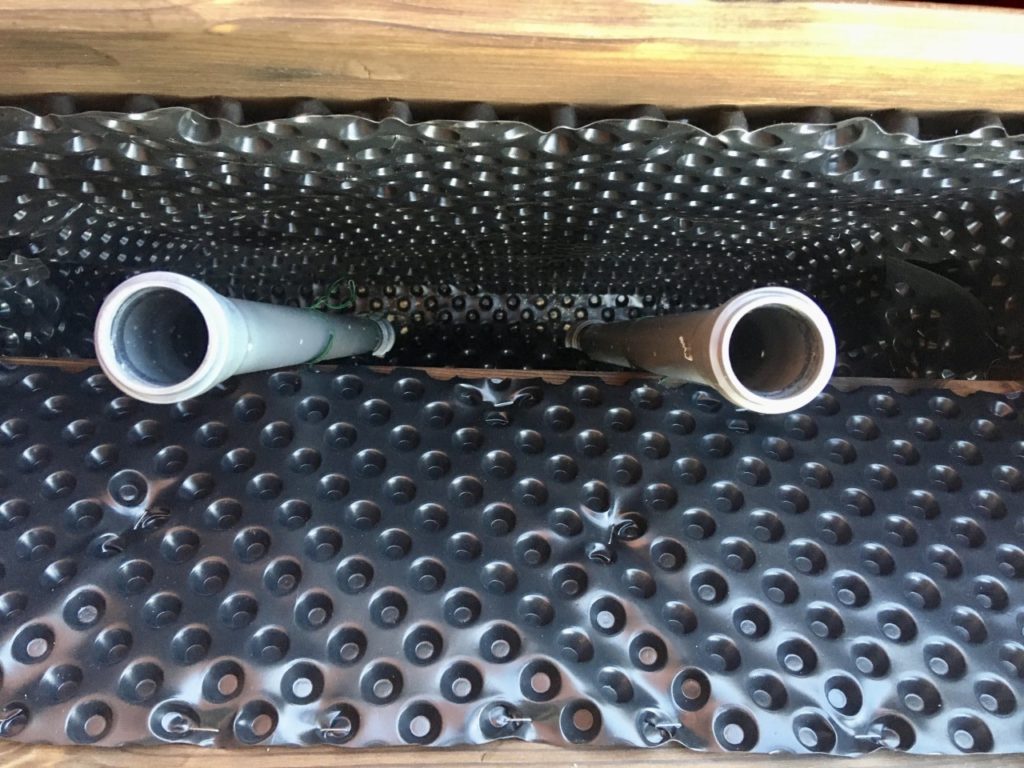
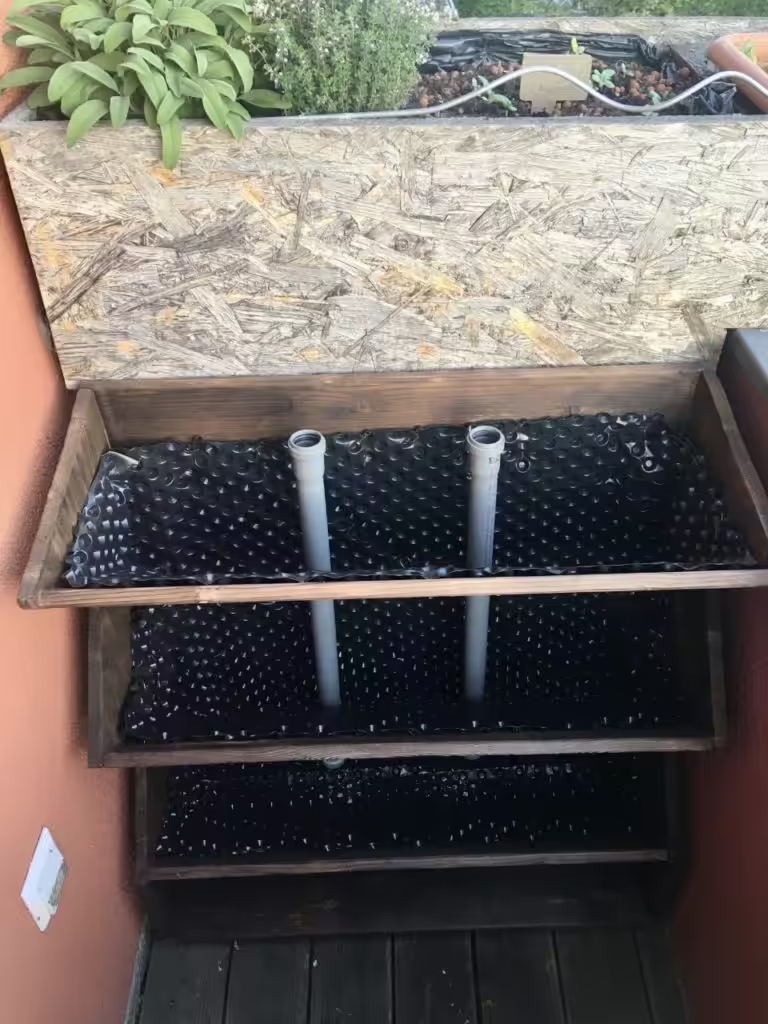
June 2018: I’ve since modified this a bit from thinking about how I could combine it with making compost. Birgit’s interview at the Kitchen Garden Congress she spoke enthusiastically about the Worm box spoken. So I used plastic pipes to install two pipe composters. I think you can see what I mean in the picture. The holes in the pipes are to ensure the connection to the soil in the box. The two drain taps are for draining the liquid. Now I’m faced with the question of how to start the composting process and with what. On the one hand, I’ve had good experiences with my worm bin and could possibly transfer the principle here, but on the other hand I’m also interested in making compost with Effective Microorganisms (EM).

Edwin has protected the horizontal pipe against blockages with a leaf guard for gutters and a so-called gutter caterpillar. However, the diameter is also sufficient for him to reach in by hand to clear it out if necessary.
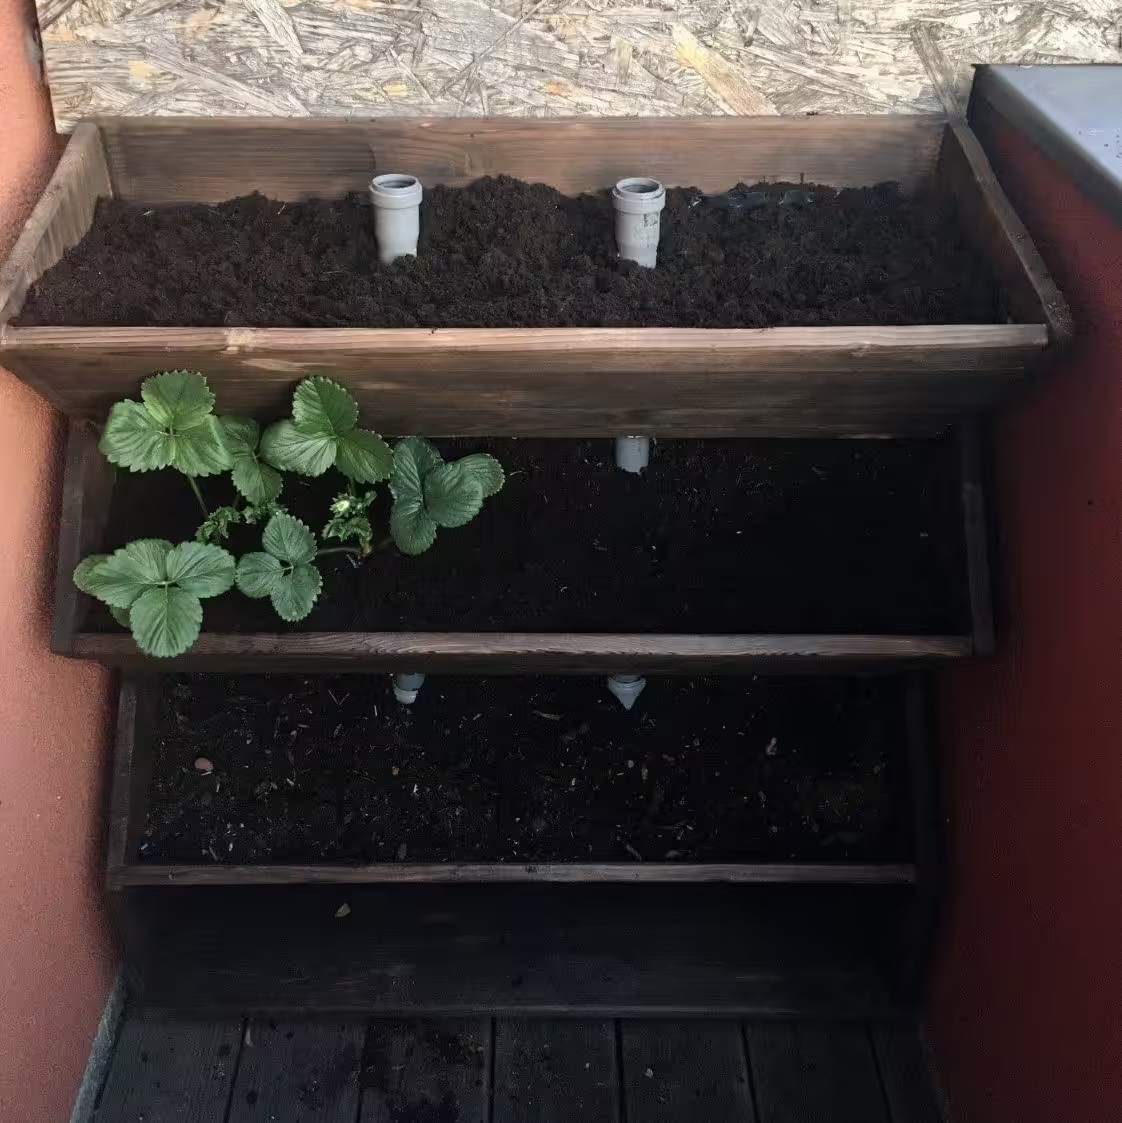
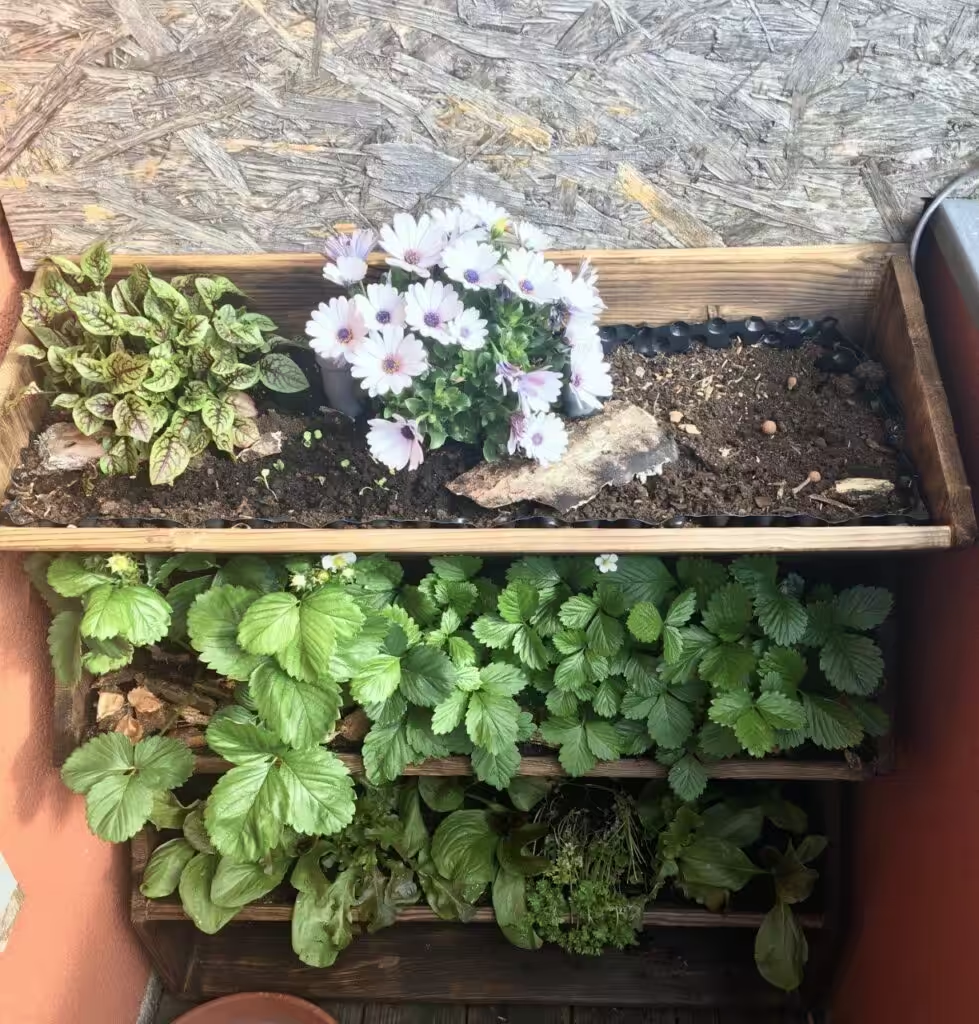
That was 2019, everything is growing and thriving.
Here’s a look at his tiered bed in March 2020, which Edwin has been supplying with fresh greens over the winter. Celery has become his favorite green, a very good alternative to parsley for him.
Thank you Edwin S.that I may publish your photos and your comments.
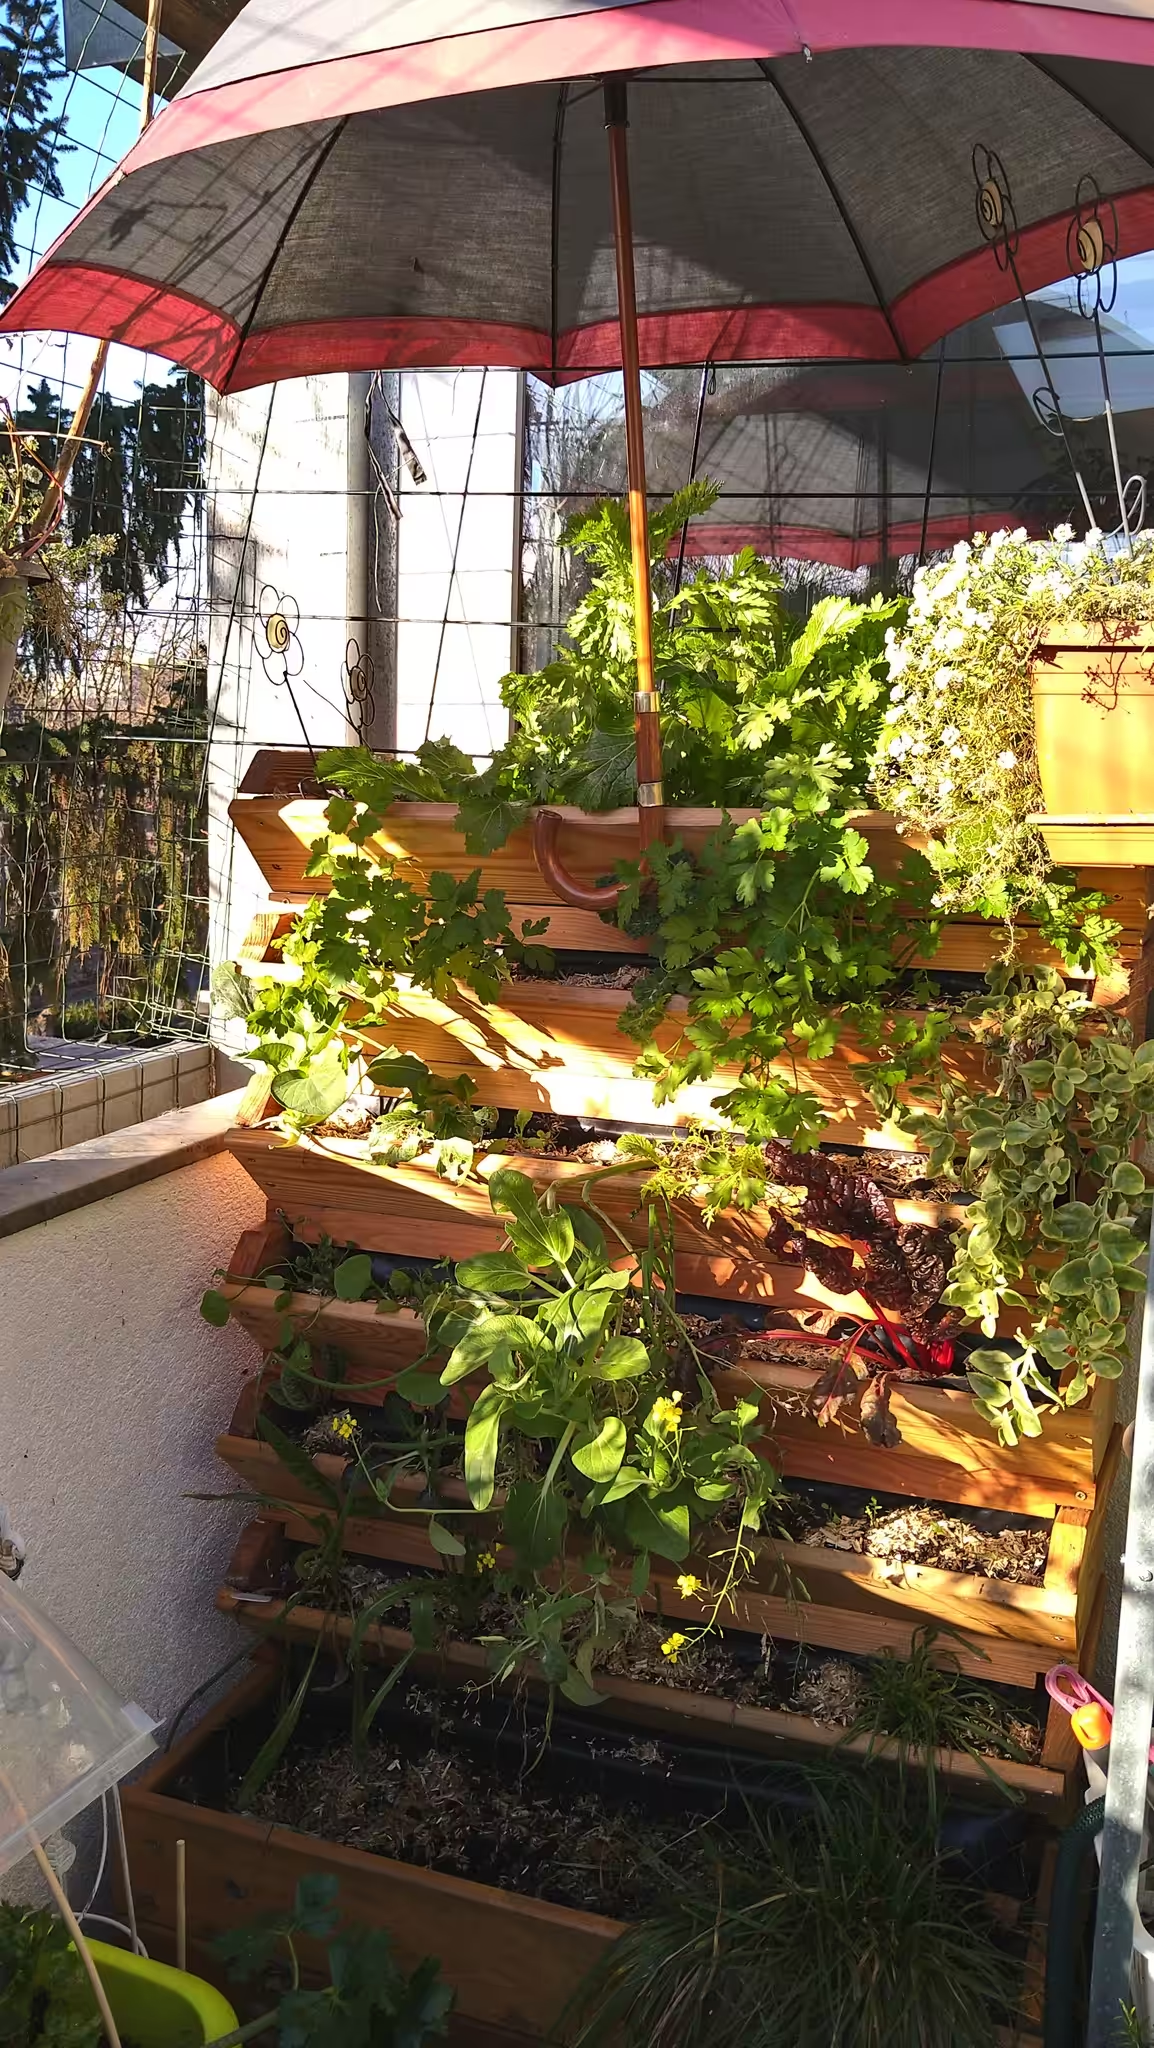
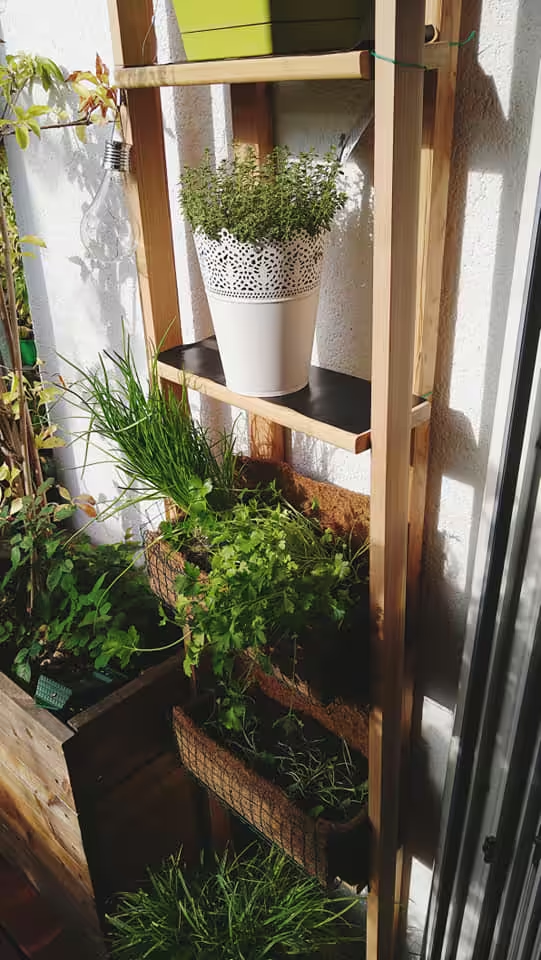
Designed and made by yourself!!! ![]() by Gabriele Wimmer:
by Gabriele Wimmer:
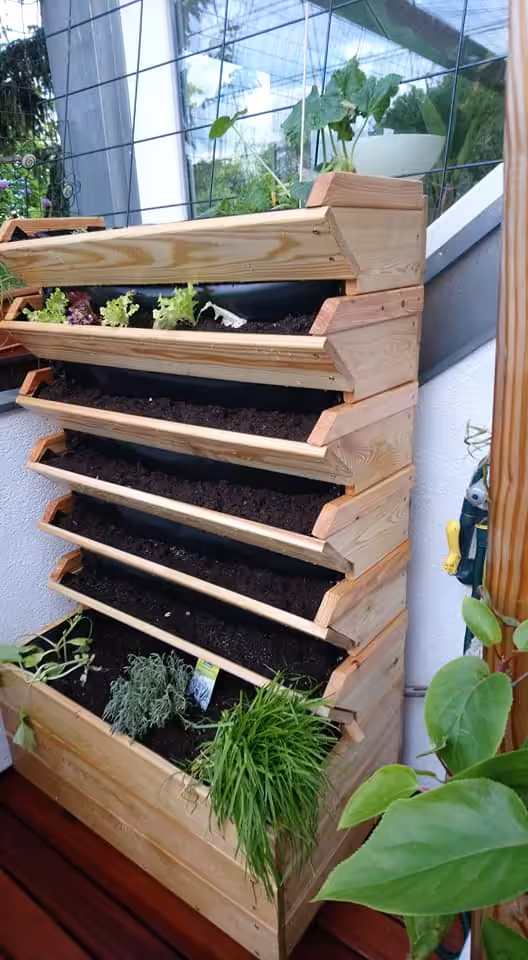
It is a continuous wall of soil — at the back, so that the roots have the opportunity to grow backwards and downwards. This naturally enables much better growth. There are more than 9!!! 40l bags of soil in it and also an irrigation system. Now it just has to grow properly and then I can harvest soon!![]()
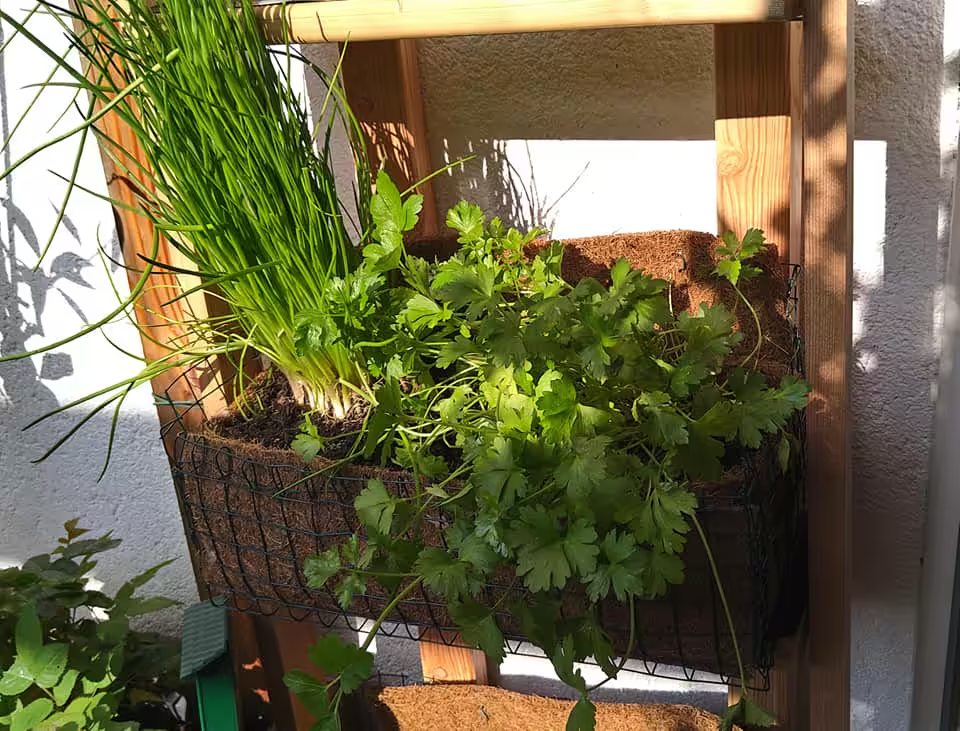
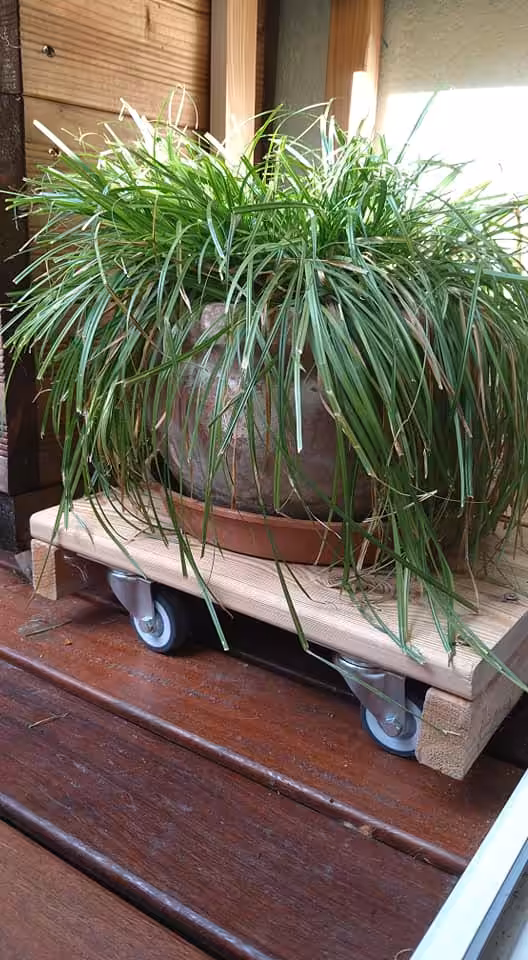
![]() I was inspired by Herbios, but I made it because I needed different dimensions and also didn’t want any cat hair on it — I have 3 Main Coons — hence the “box” with cat grass and the option of growing carrots, zucchinis etc. And it’s on castors, so it’s easy to move, e.g. when cleaning etc. is due! It is made of Siberian larch.
I was inspired by Herbios, but I made it because I needed different dimensions and also didn’t want any cat hair on it — I have 3 Main Coons — hence the “box” with cat grass and the option of growing carrots, zucchinis etc. And it’s on castors, so it’s easy to move, e.g. when cleaning etc. is due! It is made of Siberian larch.

Thank you Gabriele Wimmerthat I may publish your photos and your comments.
The extremely creative organic gardener Gabriele has continued to grow.


Here you will find My experience with this vertical bed. They are great! After the first vertical bed in 2018, I installed three more vertical beds in June 2021. The plant growth is enormous.


30 Responses
Hello Birgit,
Thank you for the great tips on vertical beds.
I have one question about this: in both your professional bed and the wooden version shown here, the pipe goes from top to bottom. Does it sit on the bottom of the board or on the ground? And how do the upper plants “water” themselves? Do they develop roots “down the back” so that they can reach the water or do I still water the soil on each level? Why do I need the two pipes then?
LG and have a nice Sunday
Sibyl
Dear Sybille, the pipes are continuous from top to bottom. They have small holes from which the water drips into the individual cups. They are filled from above with a watering can. There are also holes in these pipes in the top row. Watering is actually carried out via these pipes with holes. But regardless of this, you can also water the top and each cup individually with a watering can. All the roots grow towards the back, because that’s where the water comes from and that’s where most of the root space is. You can cleverly place the plants at an angle so that the roots are as far back as possible, close to the water pipes. Kind regards Birgit
An addendum to the description of my tiered bed:
I have since removed the compost tubes again because they filled up too quickly with the amount of vegetable waste I produce every day. I have since switched to bokashi composting, which is easier to handle.
In my experience, it is also worth providing drainage in the lower box because the water seeps downwards and collects there. To prevent rotting, I installed two drainage taps and added a layer of coarse clay granules at the bottom.
Dear Edwin, thank you for adding your practical experience from 3 years of vertical beds. It’s great that you are sharing your experiences with us. Kind regards Birgit
Hello Edwin, that sounds very interesting. I was also wondering whether you shouldn’t drill more holes in the top of the waterfall pipe than the bottom, as the water seeps down a few hours after watering anyway. Due to the extremely important and instructive commentary on irrigation by Devi on April 23, 2021 at the lecture by Martina Wappel — PROVEN IRRIGATION AND PLANT VESSELS: On the sense/nonsense of drainage (in English) https://deepgreenpermaculture.com/2019/09/06/should-you-put-gravel-or-rocks-at-the-bottom-of-plant-pots-for-drainage/ I was puzzled: aha, why drainage? So it just raises the water table. But that’s exactly the challenge in a continuous vertical bed. Won’t the upper beds all dry out faster than the lower ones?
And where exactly did you connect the tap to drain off too much water? On the two waterfall pipes? Could you take a photo or make a sketch?
In other versions of this vertical bed by Jürgen Herler, I have also seen extra irrigation tubes that extend individually to the beds. Are they not necessary here? Or is it more necessary to water the individual compartments without these mini irrigation pipelines?
Kind regards, Meli
Hello,
I’m thinking about whether to build it myself or buy the Cube 4 raised bed (Aldi, Dehner,…) (100–150 EUR). Has anyone tried the latter? The disadvantage is probably the non-continuous soil body
LG
Victor
Dear Viktor, the plants have little root space in the individual tiers. It is not a continuous body of soil. With a self-built vertical bed, you can build more than four tiers on top of each other. It depends on how ambitious you want to be with your cultivation and, above all, how high you want your plants to grow and which plants you choose. With a self-built vertical bed, you can place your plants at an angle, with the roots growing towards the continuous soil body and the plant itself growing out to the front. Kind regards Birgit
Thank you!
Let’s see if I can get the materials in days like these 🙂
Victor
With pleasure. It still works in Berlin. I would be delighted if you would like to share your “work” with the organic balcony community so that we can get even more ideas for making good use of the limited space on the balconies. We would be delighted to receive pictures (news@bio-balkon.de). Enjoy your work and happy gardening! Kind regards Birgit
Hello dear Birgit,
I would also like to try a DIY version. Does your vertical bed have a liner/drainage at the bottom or is it simply lined with larch wood? Is the wood resting directly on the ground? Do you think the two watering pipes are absolutely necessary? I would actually like to do without plastic. And my last question: what material is the slab at the back made of? I’d like to completely close the back of the bed with larch boards, do you think there’s anything wrong with that?
Thank you in advance! The congress was once again wonderful!
PS: I was able to spice up my soil for the first time this year with worm humus from my own worm bin (DIY) — I’m already curious to see how this will affect the growth of the plants 🙂
Dear Agnieszka, I think it’s great that you’re building a vertical bed yourself. Then add some soil spiced up with worm humus, that will be great. My bed is a variant where the cups are galvanized. Only the two outer walls are made of larch wood. The back wall is a relatively thin board. Your idea of using larch boards at the back is very good. The watering pipes are not absolutely necessary. It is even better to install an automatic watering system. If you have a power and water connection on the balcony, it is completely unproblematic, otherwise you can use a water tank from which the water is drawn. You’ll have less work with watering. Personally, I like watering and it’s a good way to get in touch with the plants and see how they’re doing. I also find watering a meditative activity. But with automatic watering, you can easily go away and don’t need a watering service in midsummer. I want to have it written down. I have a plastic sheet in the bottom. Tonight at 7pm is the live with Jürgen Herler on year-round vertical cultivation. You can come along and ask questions. I would be delighted if you would like to share your “work” with the organic balcony community later, so that we can get even more ideas for making sensible use of the limited space on the balconies. We would be delighted to receive pictures (news@bio-balkon.de). Enjoy your work and happy gardening! Kind regards Birgit
Hello Birgit,
thank you, this coincides with many of my questions about Edwin. I will ask some questions at the lecture today:
1. are the beds at the top dry faster than the lower compartments?
2. do I have to water the compartments additionally?
3. which irrigation method is more uniform: via individual mini-piplines or via the two irrigation downpipes?
4. would drainage at the bottom be useful to prevent rotting?
Perhaps I can think of more, but these are questions that are of burning interest to me.
Kind regards, Meli
Dear Melanie, I think we have answered the questions. Otherwise, just write to him again. Kind regards Birgit
For all those who read my questions earlier:
Jürgen Herler said in his interview yesterday:
The vertical bed stores up to 60–70 liters of water. During heavy rain, around 20 liters often fall, which just soaks the upper cups. He has never experienced the entire soil body being soaked through to the bottom. Whether only the upper or lower cups dry out depends on several factors: Plant selection, wind, sunlight, soil mulching with e.g. grass clippings, organic material, or other (bark mulch). The most important thing is that everything is as green as possible, then less evaporation occurs. The new vertical beds do not have 2–4 watering pipes at the back of the body, because watering via a drip line with approx. 6 nozzles (15 cm apart) has proved to be more even. If the upper cup is rather dry, you could blindly close an irrigation tube at the bottom and add one at the top. In addition, with the exception of the solitary beds, all wall models have a stainless steel tray inside, which collects the excess water and can be drained off via pipes. However, the aim is to water less so that there is not “too much” water in the first place. A drainage layer is not necessary overall, but you can use a little more Agroperl at the bottom. He also said something about a drainage mat.
The soil has been tested and improved over many years and is specially adapted to this vertical bed. see here: https://www.herbios.at/bio-vertikalbeeterde This is virtually impossible to obtain even from the DIY store. The problem is that clay soil compacts over time, and the cheap soils from the DIY store are contaminated with heavy metals. The organic soils from the DIY store were also tested and did not work so well. The mixture with Agroperl, earthworm humus, lava sand, bark humus and hot-rot compost is just special. https://www.herbios.at/bio-vertikalbeeterde
I therefore also tend to order the soil directly from him. An irrigation professional told him 3–4 years ago: 2/3 of the success of irrigation is the soil! And that was his experience too. It must be able to store water well and should remain loose.
Overall, the system is very well tested, and very high quality with larch wood, the Gardenia irrigation system. And they are currently working on a solar module for the balcony-free gardeners.
A self-assembly kit has also been requested, but due to a lack of time, nothing has been planned yet. But that may still happen.
If you add everything up… planning, working time, soil mixture, perfectly coordinated irrigation system, high-quality materials: larch, stainless steel… then the price is somehow justified.
Anything you build yourself will be hard to match the original. But I understand all those who try anyway. Spruce is just more short-lived. You have to accept some disadvantages.
Covered balconies are even better for winter cultivation, because then it doesn’t rain constantly on the tender winter vegetables (risk of permanent moistening of the soil and root rot, as well as mildew on the leaves). Here in Stuttgart, continuous rain has become rather rare. It tends to be too dry overall, even in winter.
Until then, Meli
Dear Agnieszka,
I like your version best so far, as it looks the most like the original. Could you please give some details about the dimensions (5 square elements on the side, overall height, height and width of the slats).
Were the floorboards available at the DIY store?
Many thanks and best regards,
Flo Hannich
Hello Flo,
I based the dimensions on the boards I got on site. The boards for the inserts are 1 m long and 14 cm wide and are at a 45°C angle. The side boards of the continuous earth body are 14.5 cm deep and approx. 130 cm high. I originally had 7 inserts (“cups”) in it with small gaps between them, but have now placed them as close together as possible and added another insert.
LG, Agnieszka
Hello dear Birgit,
So far, I don’t have a green thumb either. So I have to start very slowly. But your conferences have really inspired me. I’m lucky enough to have a mini-garden next to our first floor apartment, which I’ve mainly planted with herbs and other insect-friendly plants (hedgehogs have also been coming to my garden regularly for 2 years and I feed them). Directly in front of my balcony is a relatively narrow passageway, where unfortunately nothing wants to grow. The area is south-east facing and gets a lot of sun. It’s not covered, but there is a house wall. I really like the idea of putting two vertical beds there, but is that even feasible? Are there any tips and/or links? Many thanks for your great work!
Dear Nadja, vertical beds are ideal if you want to make better use of the space. You have the advantage of making better use of the base area. In some cases, the light comes in better if you garden in an elevated position. If they are placed in front of a house wall, they still have the advantage that the house wall radiates heat during the transitional period and in winter, which benefits plant growth. From my point of view, reading your short text, there is nothing to be said against it. Perhaps the soil there is too compacted for anything to grow. You can find instructions/inspirations for DIY construction in the blog article above, and I always recommend Jürgen Herler HerbiosGarden for purchase https://bio-balkon.de/empfehlungen/vertikalbeet/who also gives good advice. It’s great that you have hedgehogs coming by. That’s a very good sign. Kind regards Birgit
Hello everyone,
I would also like to build a vertical bed myself and I have a few more questions:
1. approximately how large the continuous gap behind the individual floors should be
2. how far should the tiers protrude or does a 45 degree angle make sense? I want to make sure that the plants get enough sun.
3. is pure wood sufficient for the back wall and shelves or should they be covered or protected with a pond liner or something else?
Thank you very much for your help and best regards
Stefan
Dear Stefan, I can’t be more precise. Wood is sufficient, pond liner is not necessary. Good luck! Kind regards Birgit
In the question-and-answer session with Jürgen Herler at the Best of Congress May 2022, the question arose as to which timer he recommends for automatic irrigation and which he works with. “Water protection class IP44. A timer for outdoor use that doesn’t cause any problems in the rain, has a hinged lid and is splash-proof. All timers are actually good. I like the menu navigation because the intervals can be adjusted so quickly. Up to ten times. I can use it to time everything I ever need for balcony gardening. I usually only need 6 or 7 times. You should be able to see it in our webshop when you zoom in. Or simply search the Internet: Timer water protection class IP44. It costs between 11 and 15 EUR0. I like it because it’s for outdoor use and is a standard product that probably every DIY store and online retailer has. We just take it too.”
Hello, are there any dimensions of the boards for variant 1?
No. Every balcony has different conditions. That’s the advantage of self-build: you can adapt it to your own balcony. The commercial version has the following dimensions https://www.herbios.at/product-page/diy-natur-100e (discount voucher Bio-BalkonDIY2023). Kind regards Birgit
Hello!
I’m thinking of building a vertical bed on our completely covered (other balcony above) terrace. The terrace is perfectly north-facing, so it’s shady almost all year round. We are in the Neuweiler Basin in the Rhine Valley and therefore always have a warmer climate here. Can more than just lettuce grow there or does it get too little sun?
Thank you already for the answer 🙂
Andreas
Dear Andreas, more will grow. Vegetables with dark green leaves are well suited to north-facing balconies: kale, palm kale, chard, spinach, Asian lettuce (which is actually cabbage), barbara cabbage, watercress, chives, chopped garlic, parsley, celery and many more vegetables and herbs are suitable. The upper tier is for tall plants: palm kale, kale, chard, celery. You have the advantage of the Rhine Valley, go ahead. There are always balcony dwellers who harvest tomatoes on north-facing balconies. Not as many fruits as on south-facing balconies, but nothing is out of the question. Kind regards Birgit
Thank you very much for the quick and detailed answer!
Do things like kohlrabi or even cucumbers also work? I have very normal children when it comes to vegetables and I think it would be nice to get them interested in the topic with this twist 😉
LG
Andreas
Of course. The cucumbers want to climb, so either put them at the bottom in good light and let them climb up the sides or put them on the top floor and then let them grow on the wall/ceiling. Snack and snack cucumbers often like the normal children :). Kind regards Birgit
Hello everyone!
I have a self-built vertical bed on my covered south-facing balcony. It has four levels and a larger trough at the bottom; to prevent the wood from getting moldy, we lined everything inside with bubble wrap.
Somehow the vertical bed and I just don’t get along. Last year, all the plants in it died (except the ones in the lower trough). I suspect it was too dry (perhaps the soil heated up too much due to the dark dimpled foil and the south-facing side?)
This year I made ollas out of clay pots and planted them between my crops. So far so good. Some of the crops still look unsightly, but for the most part it’s fine. Unfortunately, I’m now struggling with fungus gnats that I brought in from an organic gardener 🙁 My carpet basil also looks almost dead. I don’t know why. It’s south-facing, so it’s warm and dry and I haven’t watered it much. Other plants (e.g. the oregano I bought and the seedlings of the Turkish dragon balm) have traces of some kind of sucking/gut-eating animals on the leaves.
I’m about to give up and sell it 😢
Hence my questions:
1. has anyone had similar experiences with the bubble wrap (heats the soil too much) and could confirm or refute my assumption? If the information is important: the foil is only a few centimeters above the surface of the soil.
2. are your plants in the vertical bed also much more susceptible to fungus gnats, aphids and other sucking insects? Last year I also had spider mites in the bed.
3. what is the most effective way to get the fungus gnats out of the VB? Water each level with nematode water?
4. is there anyone who would like to share their experience with a vertical bed on the south side?
5. how do you water the beds that are on the south side? I’m torn between watering less to get rid of the fungus gnats that are everywhere in the bed and watering more so that everything doesn’t die…
6. does anyone have experience of whether Ollas work in VB?
Thank you in advance! Best regards
Alex
Variant 4 vertical gardening DIY
Hallo Agnieszka
Das sieht sehr gut aus. Hast du dazu eine Bauanleitung gemacht?
Das wäre toll.
LG
Raymond
Die Maße habe ich in einer Antwort weiter oben bereits genannt, eine Anleitung habe ich nicht ;-).